Matat Comax ERP is an all-in-one system made for Shopify merchants. It helps you manage catalog, inventory, and orders, shipping from one place. Additionally, Matat Comax ERP connects directly with Shopify to keep your data in sync and automate everyday back-office tasks.
This documentation walks you through everything you need to get started with Comax, from installation and setup to catalog, inventory, orders, locations, and automation.
Getting Started with Comax (Video Guide)
Step 1: Install the App
Install the app from the Shopify App Store (apps.shopify.com).
- Click Install.
- You will be redirected to the App Dashboard.
- To use the app, you must activate a subscription plan.
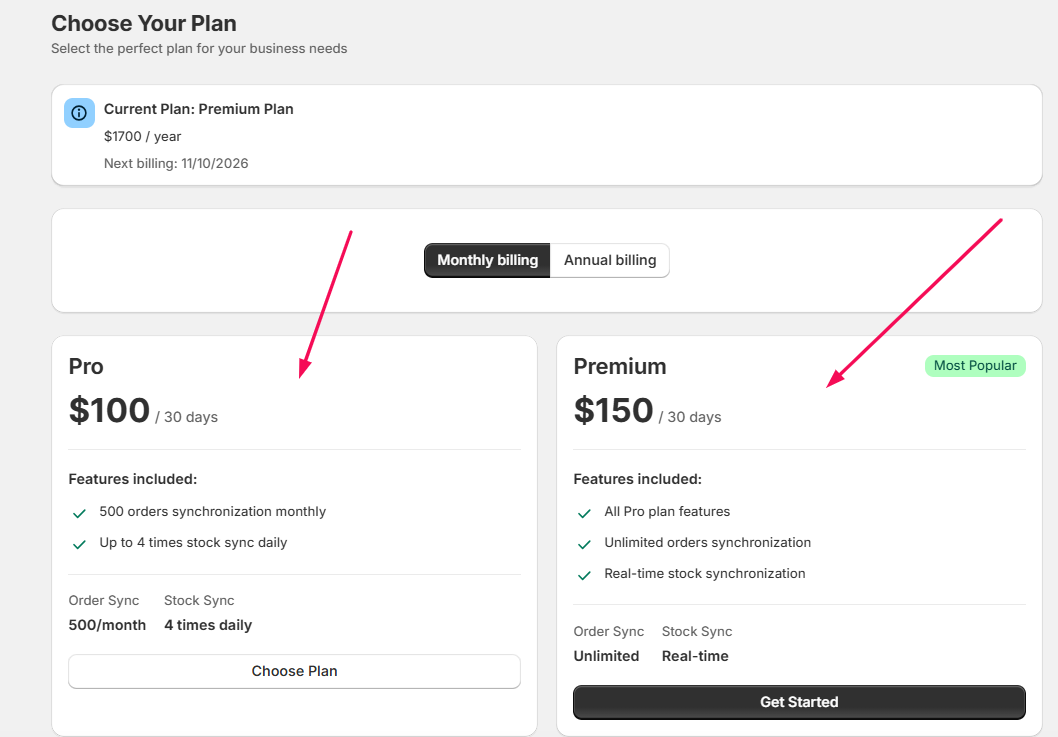
- Choose a plan from the available options.
Difference between the Pro and Premium Comax Packages
|
|
|
|
|
|
|
|
|
|
|
|
|
|
|
|
|
|
|
|
|
|
|
|
- Click Select, complete the payment process, and your subscription will be activated. You can then access the setup guide.
Your Setup Guide includes three steps:
- Comax Configuration Settings
- Sync Catalog from Comax
- Sync Inventory from Comax
- Map Comax Location to Shopify

Step 2: Comax Configuration Settings
Click Go to Settings under Comax Configuration Settings.
1. Login Credentials
- Login ID: Enter your Comax Login ID.
- Password: Enter your Comax Password.
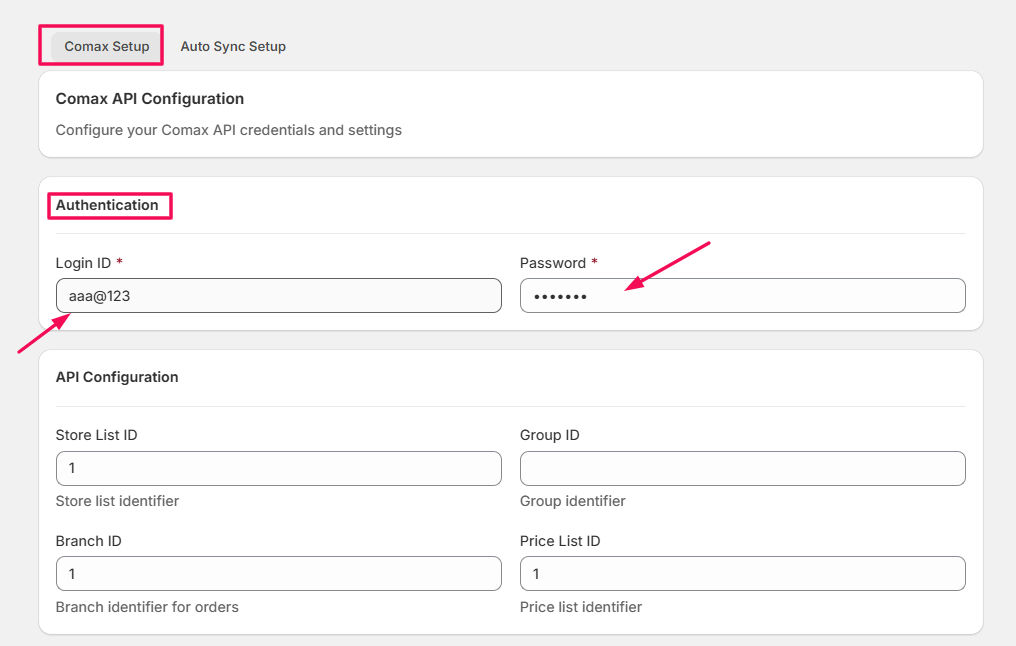
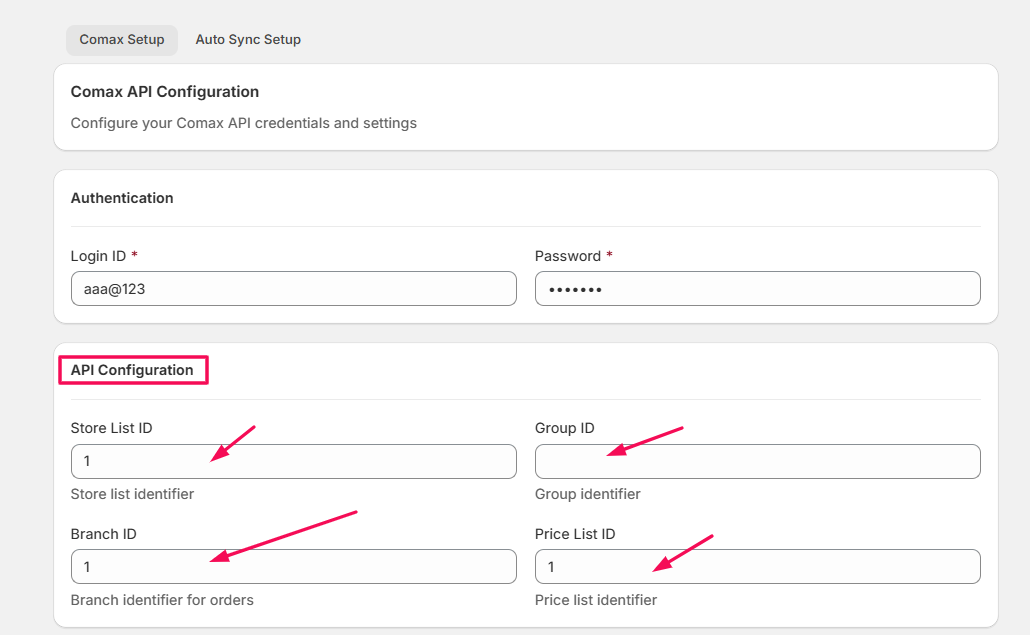
2. API Configuration Fields
You must enter the following Comax details:
- Store ID List: Identifies the specific Comax stores whose inventory and product data will sync with Shopify.
- Group ID: Used to group products or configurations under a specific Comax-defined category.
- Branch ID: Identifies the Comax branch from which data (inventory, pricing, etc.) will be retrieved.
- Price ID List: Defines which price list from Comax should be applied to the synced products (e.g., retail price, special pricing).
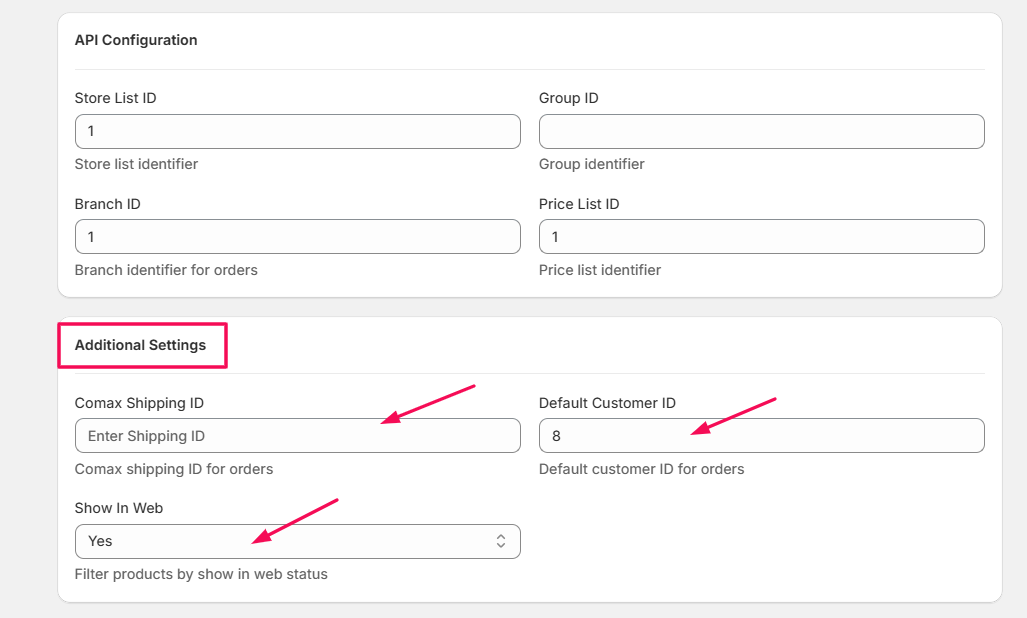
3. Additional Settings
- Comax Shipping ID: Determines the default Comax shipping method to be applied during order syncing.
- Default Customer ID: Used when orders are synced from Shopify to Comax, and no specific Comax customer record exists for that shopper.
- Show in Web (Dropdown Options: Yes, No)
- Yes: Products will be marked as visible/available on the web store.
- No: Products will be hidden from your web store.
4. Test & Save Settings
- Click Test Connection to ensure your Comax credentials and configurations are correct.
- If the test is successful, click Save Settings.
- You will be automatically redirected to the dashboard.

Step 3: Sync Catalog
For first-time users, follow these steps to sync the Catalog from your Shopify stores:
- Go to Sync Catalog.
- Under Manual Catalog Sync, click Sync Catalog Now.
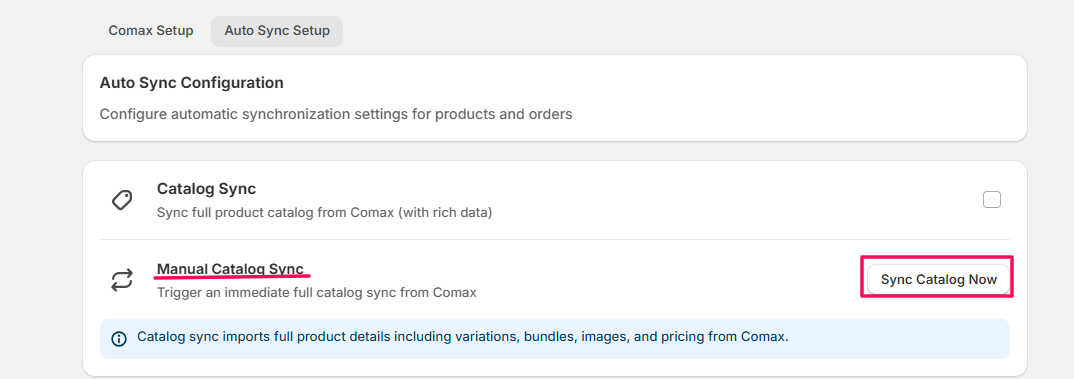
This process might take some time, depending on the number of products you have in your store.
Step 4: Sync Inventory
If this is your first time using Comax for your business, you must follow these steps:
- Go to Sync Inventory.
- Under Manual Sync, click Sync Now.
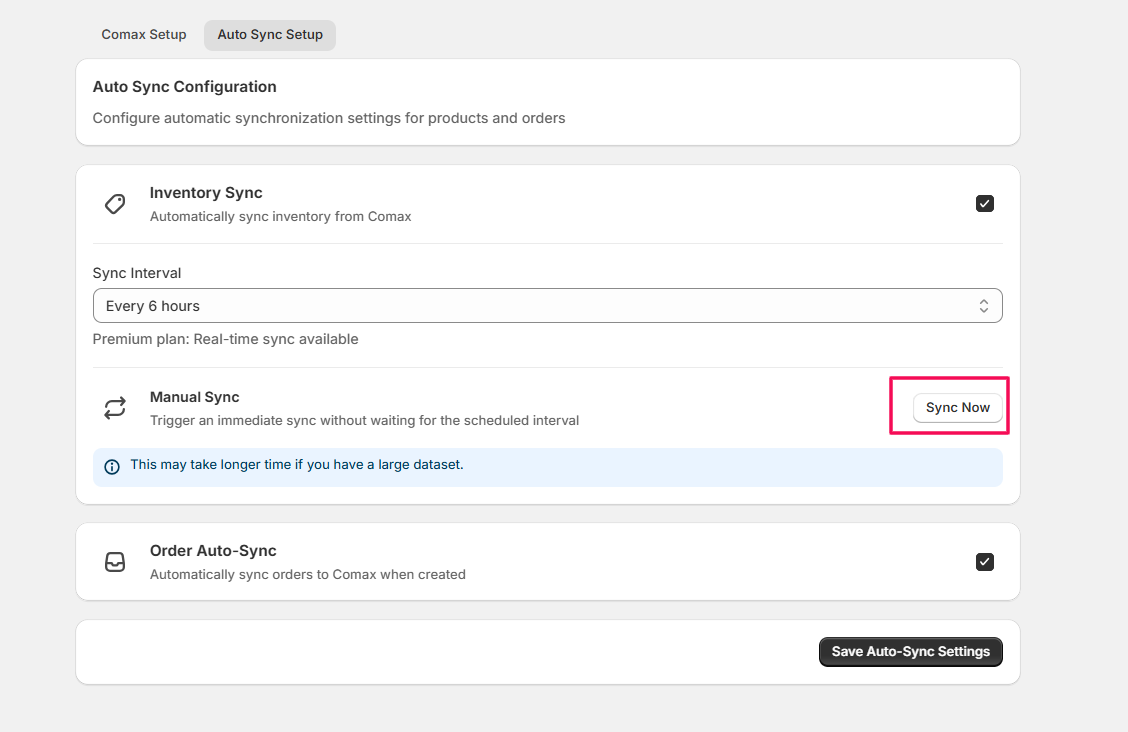
- Wait a few moments while Comax retrieves the inventory data from your store.
- Once syncing is complete, you will be redirected back to the app dashboard.
Note: Once this setup is complete, you can come to set up automatic syncing anytime. The scheduled setup configuration will be covered later in the documentation.
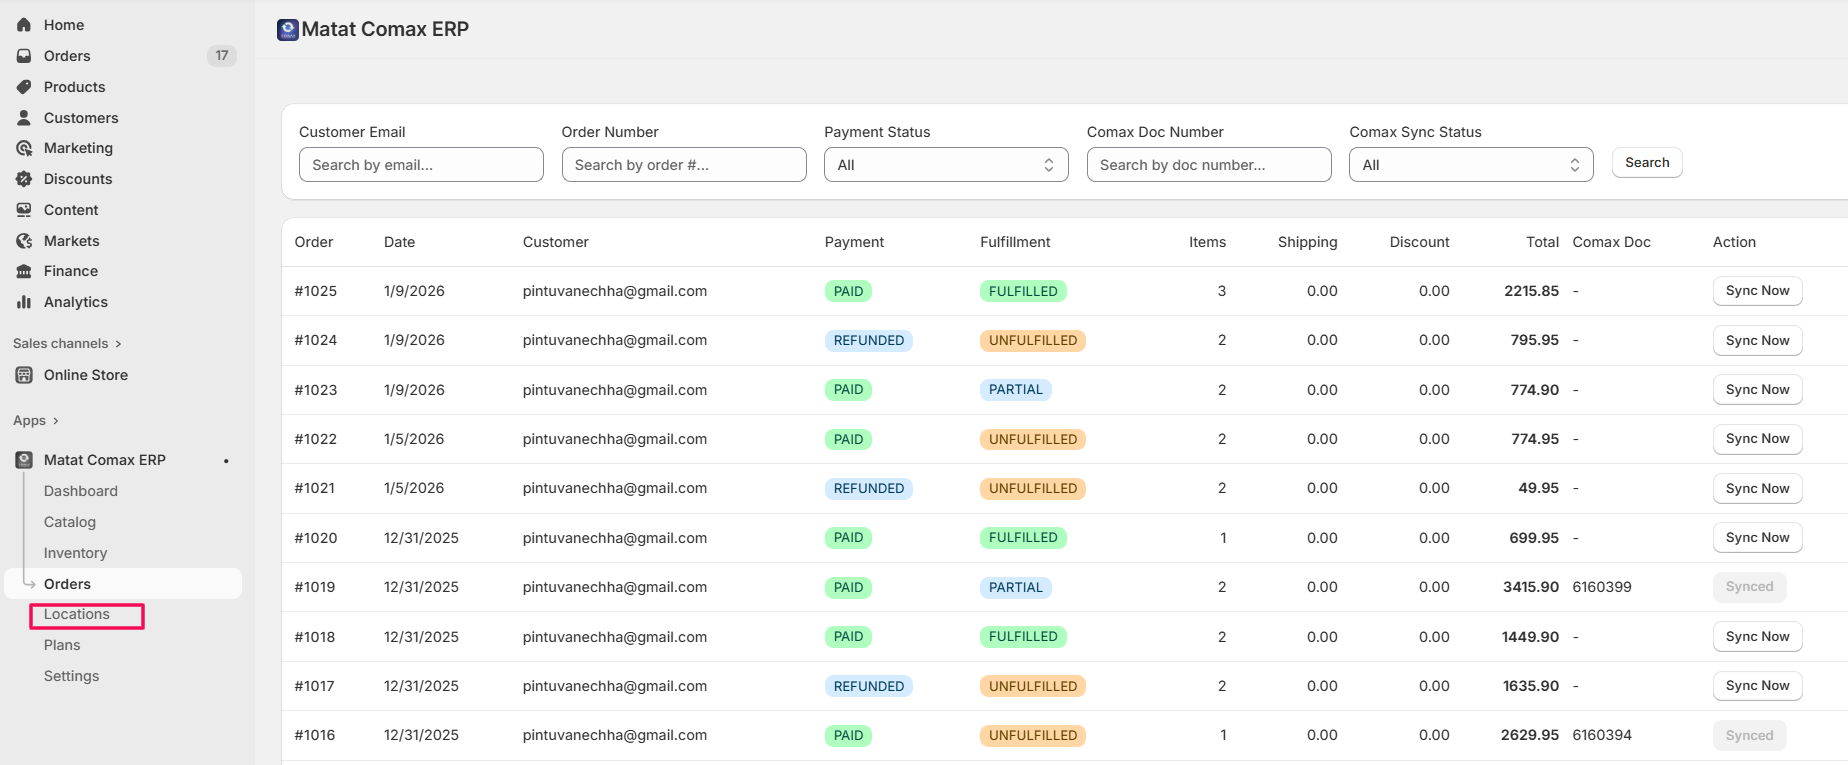
Step 5: Map Locations
- Click Map Locations on the screen.
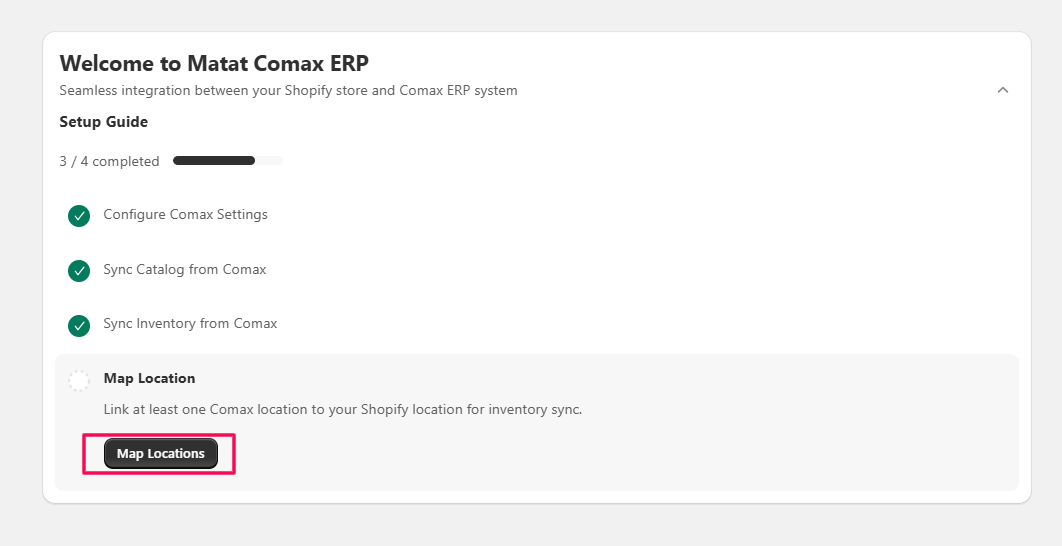
- You will be taken to the Location List.
Here, you can individually map locations for each product according to your needs.
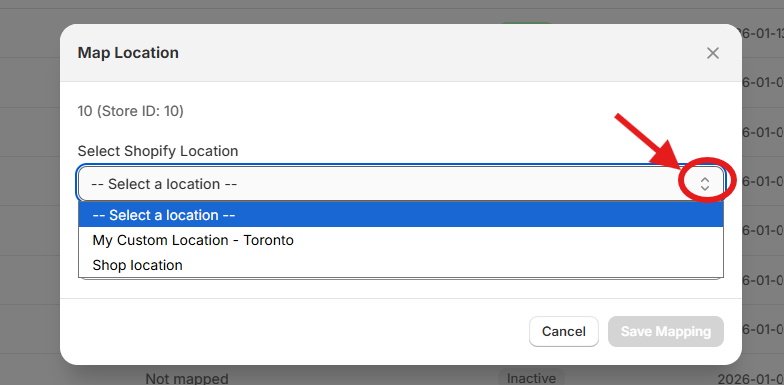
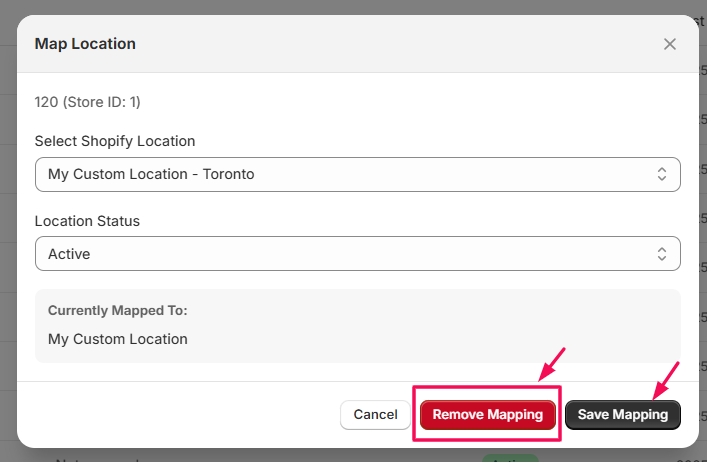
Mapping Locations
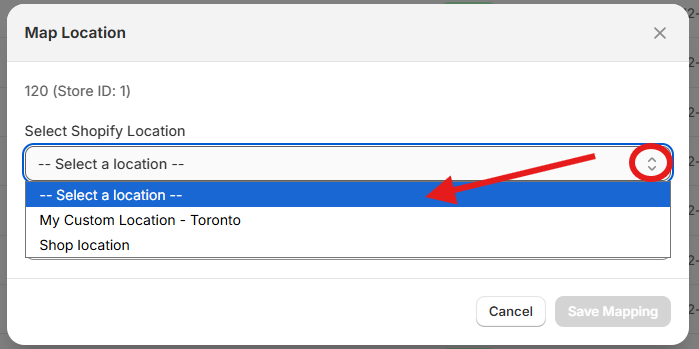
- Select Map on the selected product.

- Select the store location from the Select Shopify Location dropdown.
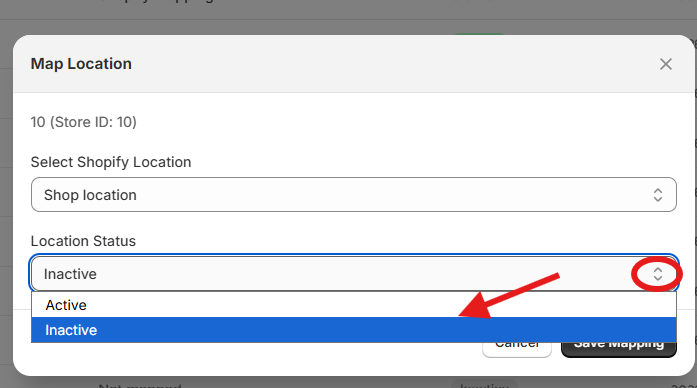
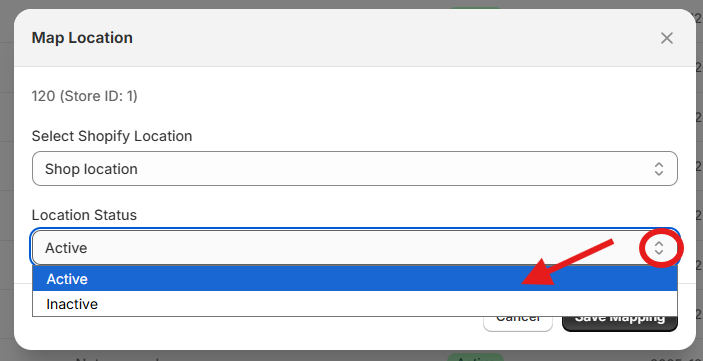
- Choose the status of the location (active or inactive) from the Location Status dropdown.
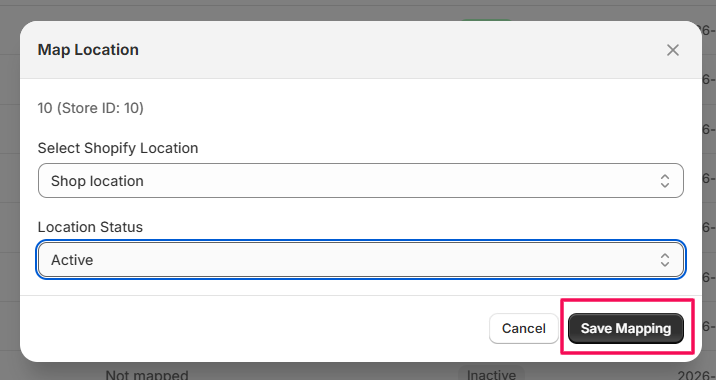
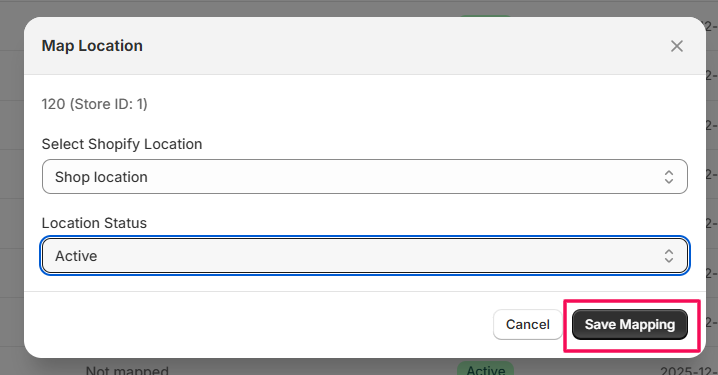
- Click Save Mapping to save the mapping location.
- Once you finish mapping the location, your setup is complete, and you can now access the Matat Comax ERP app dashboard.
Note: The product data, inventory, and store locations will only be synced to your Shopify store after all locations have been successfully mapped. Make sure to complete this step to ensure accurate synchronization across your stores.
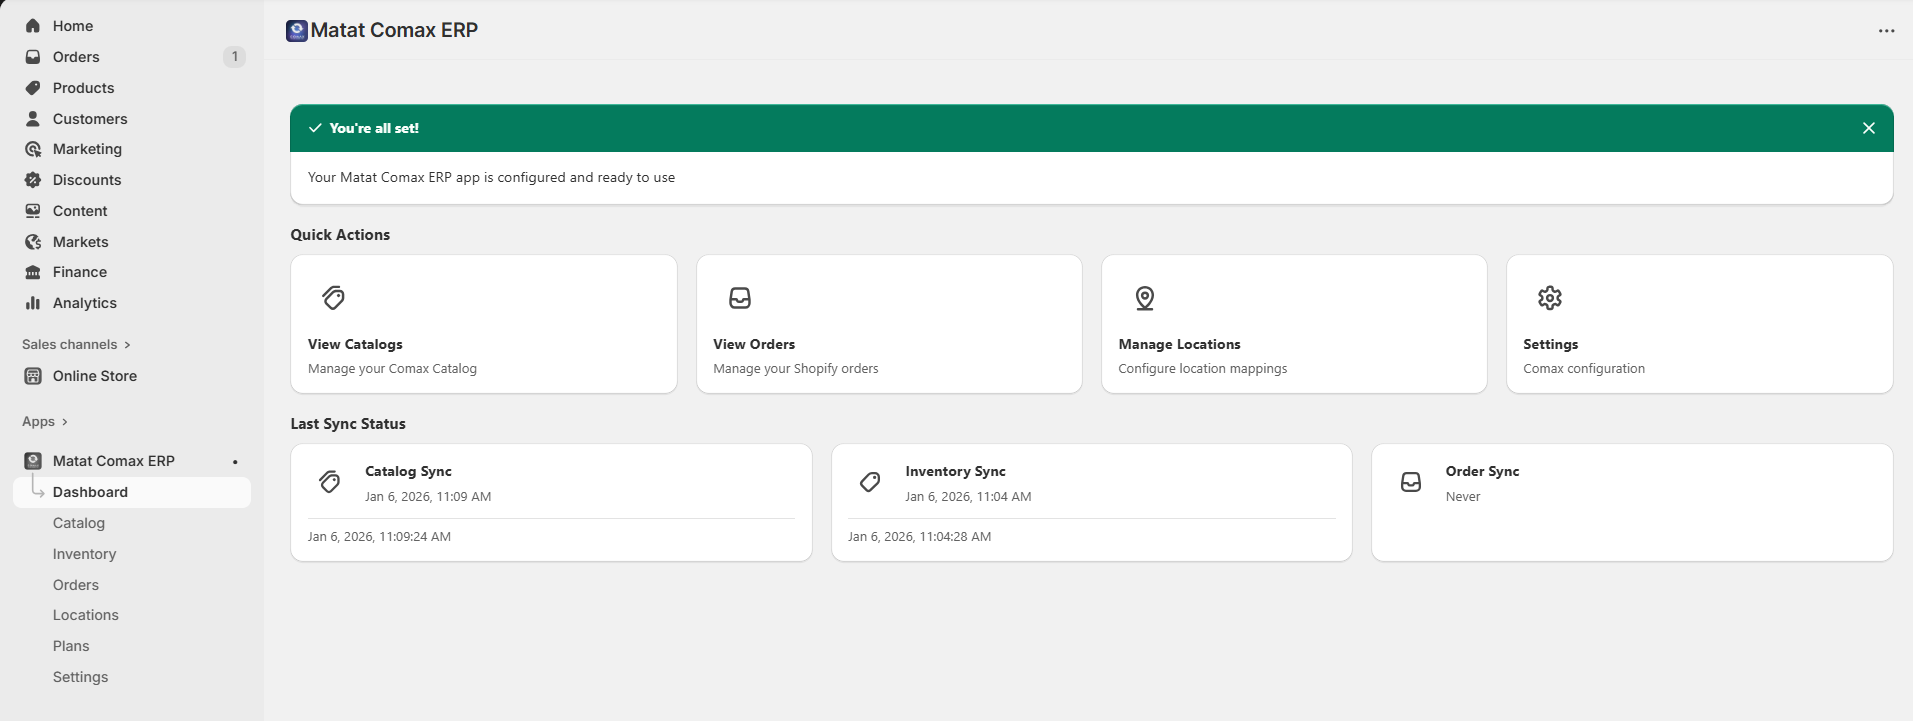
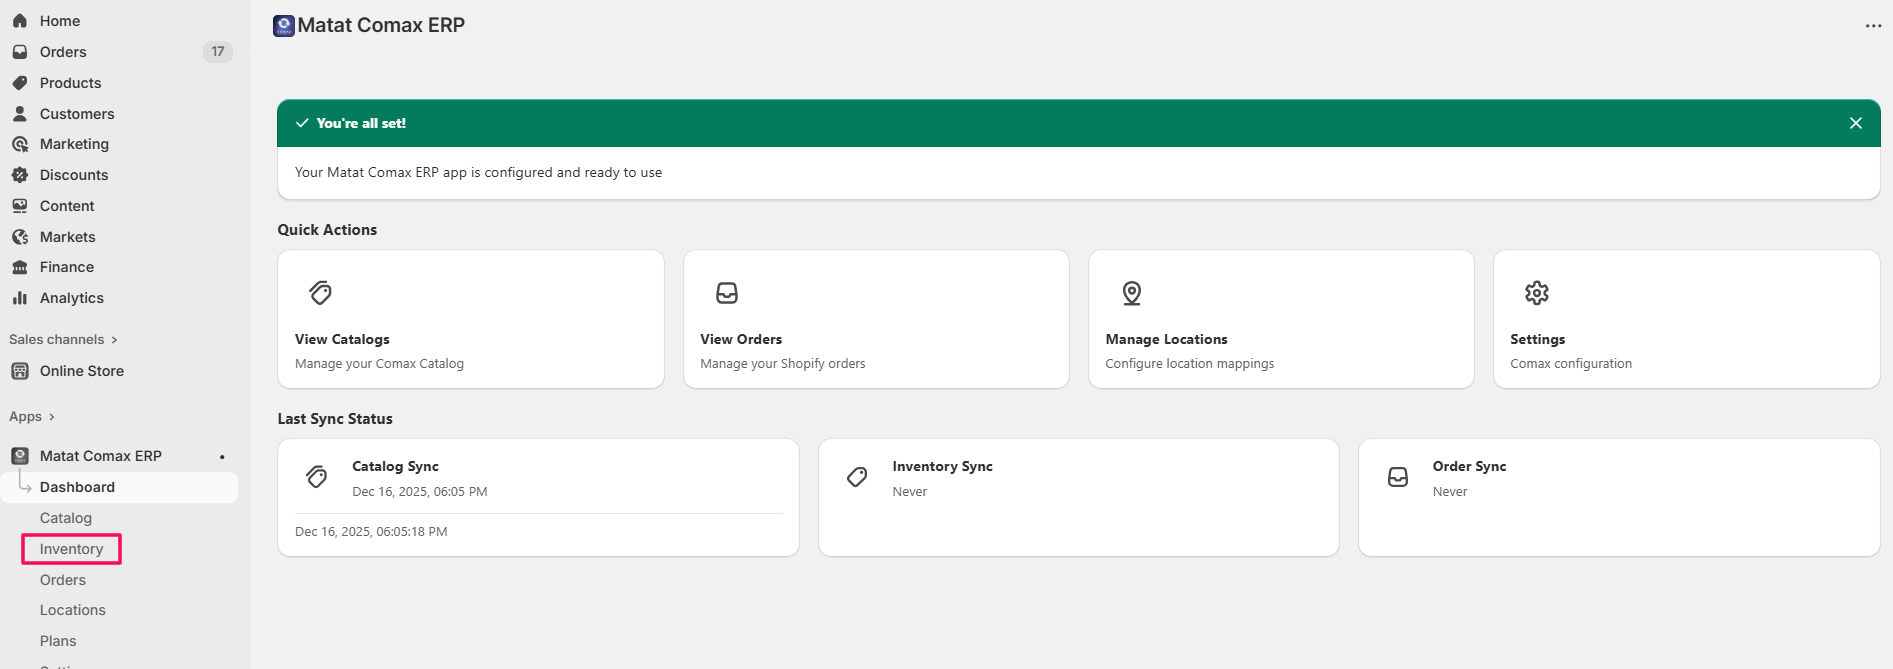
Step 6: Accessing App Features from the Dashboard
Once your setup is complete, you can easily access all major features directly from the Dashboard.
You can manage:
- Products
- Orders
- Locations
- Settings
These sections can be accessed in two ways:
- Directly from the Dashboard, where quick-access cards/buttons are displayed.
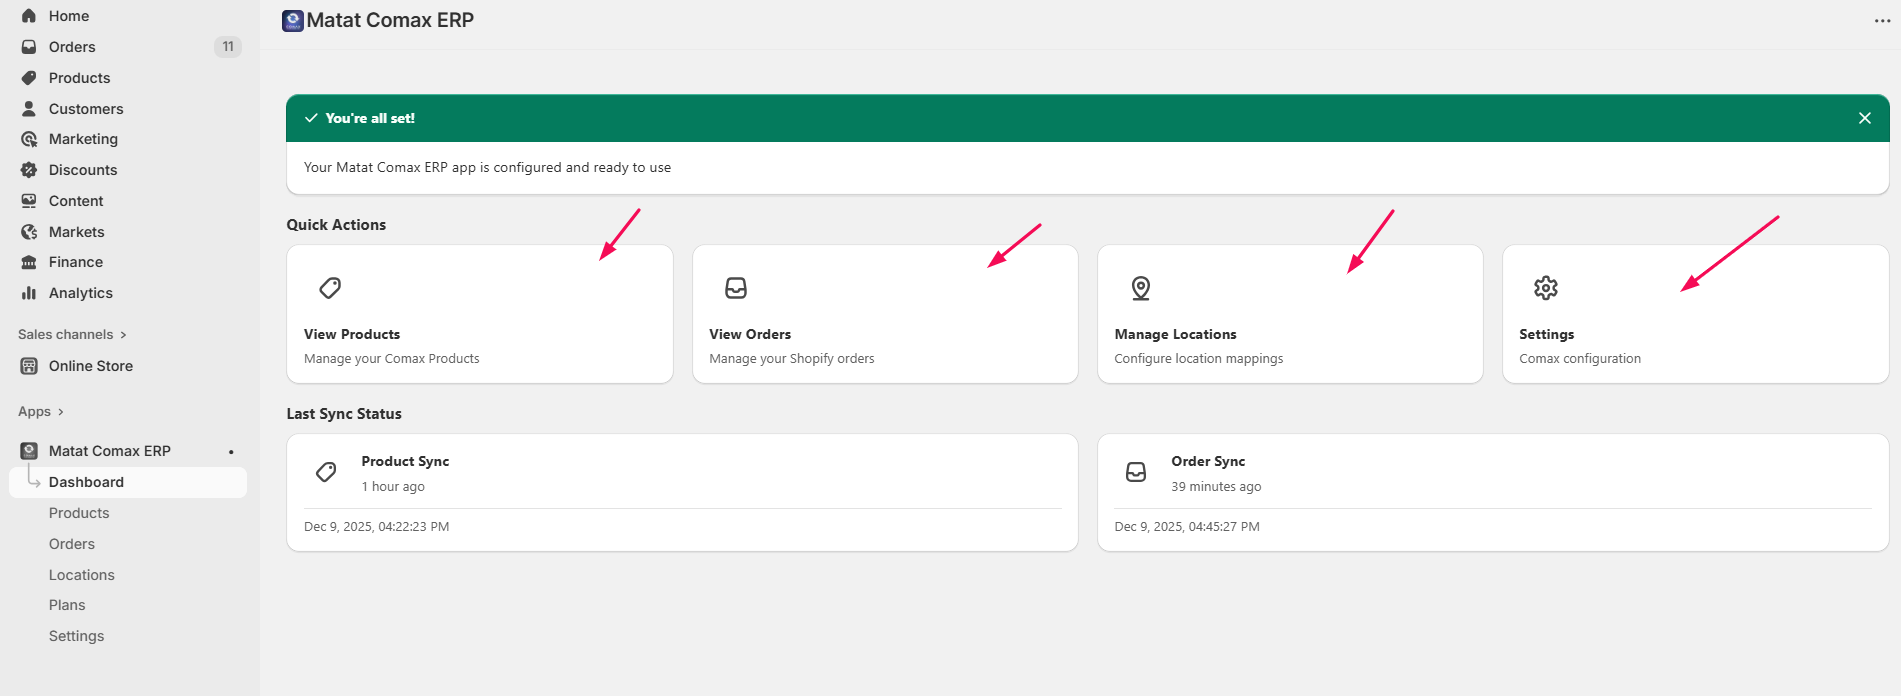
- From the Setup Menu on the left-hand sidebar, which provides navigation links to all core features.
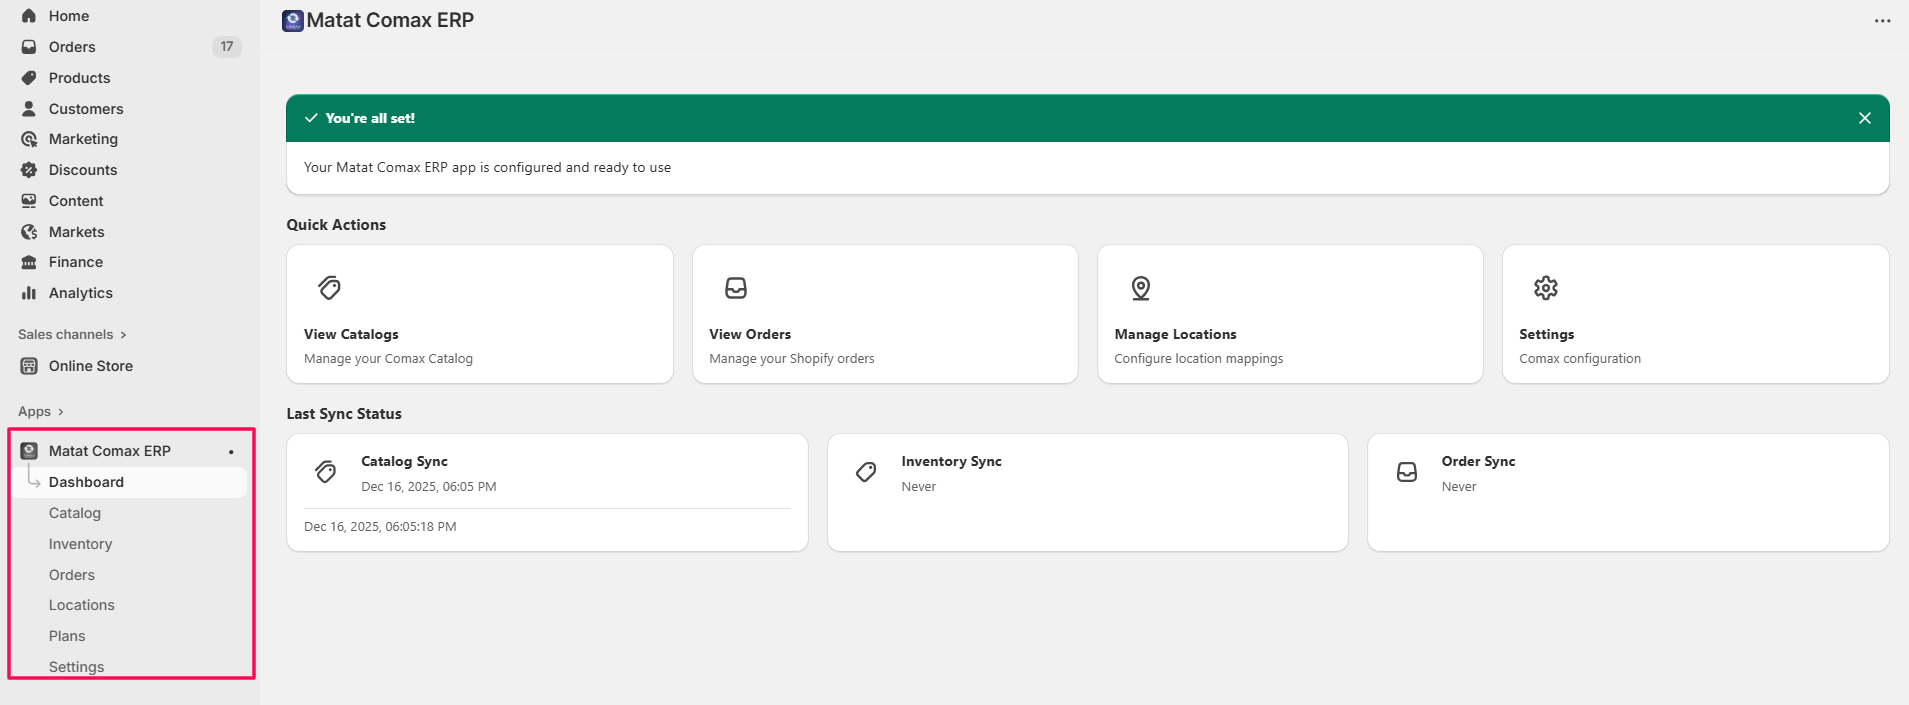
This makes it simple to move between product management, syncing, location mapping, and configuration settings from anywhere within the app.
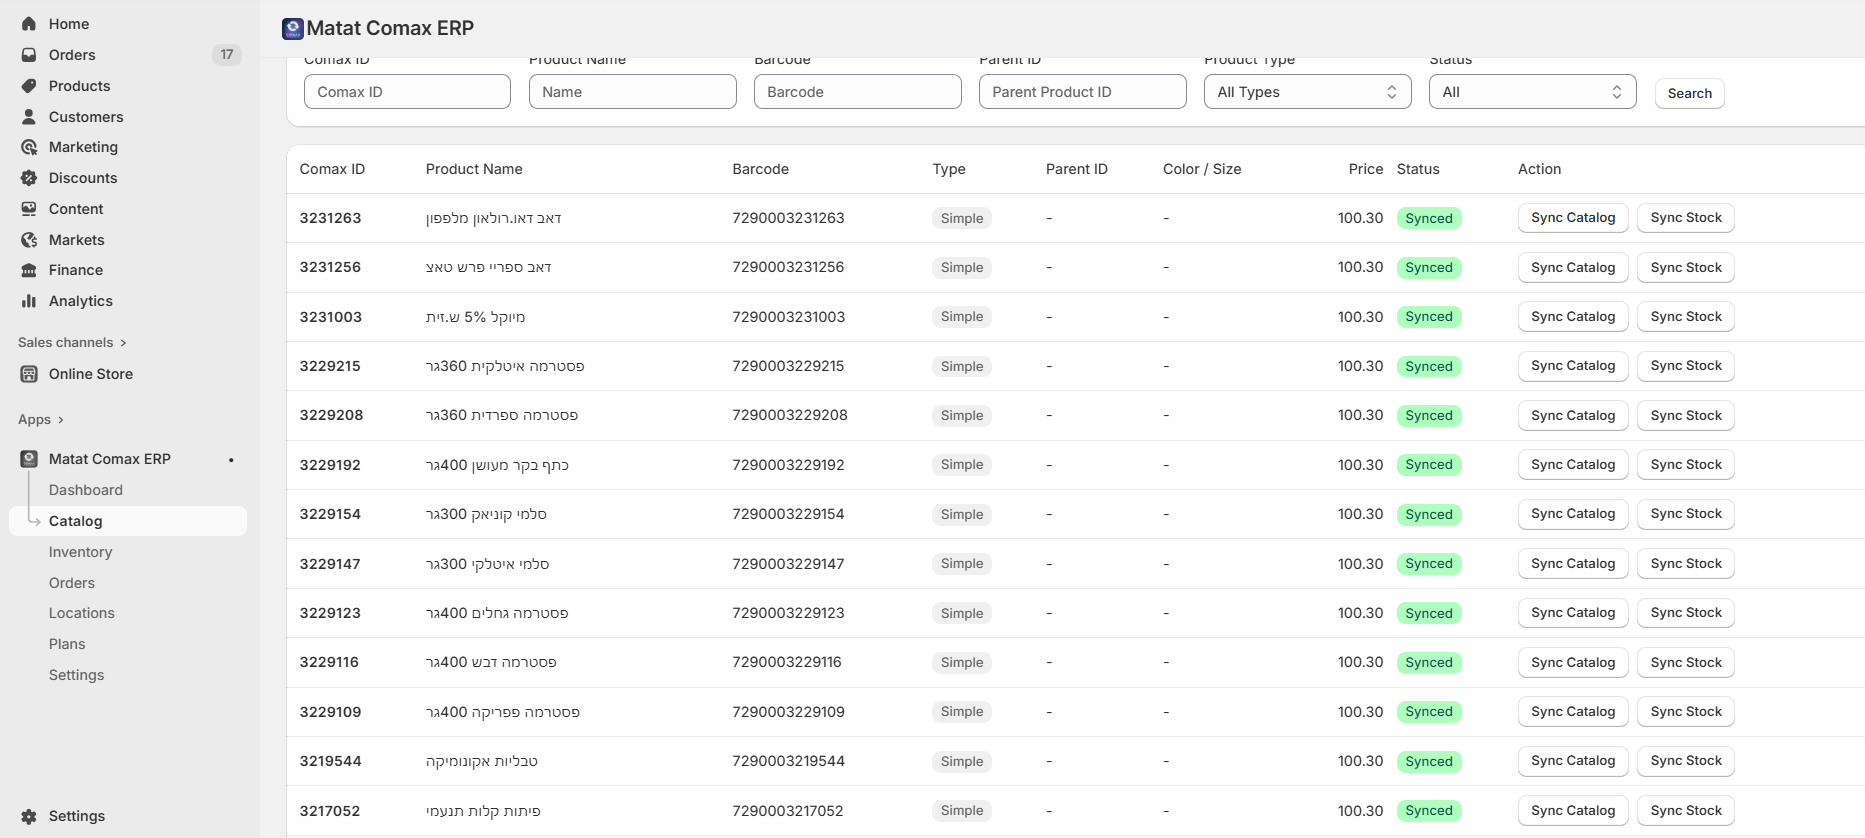
1. Catalog Sync Feature
- Click Catalog from the left-side menu in the Comax app.
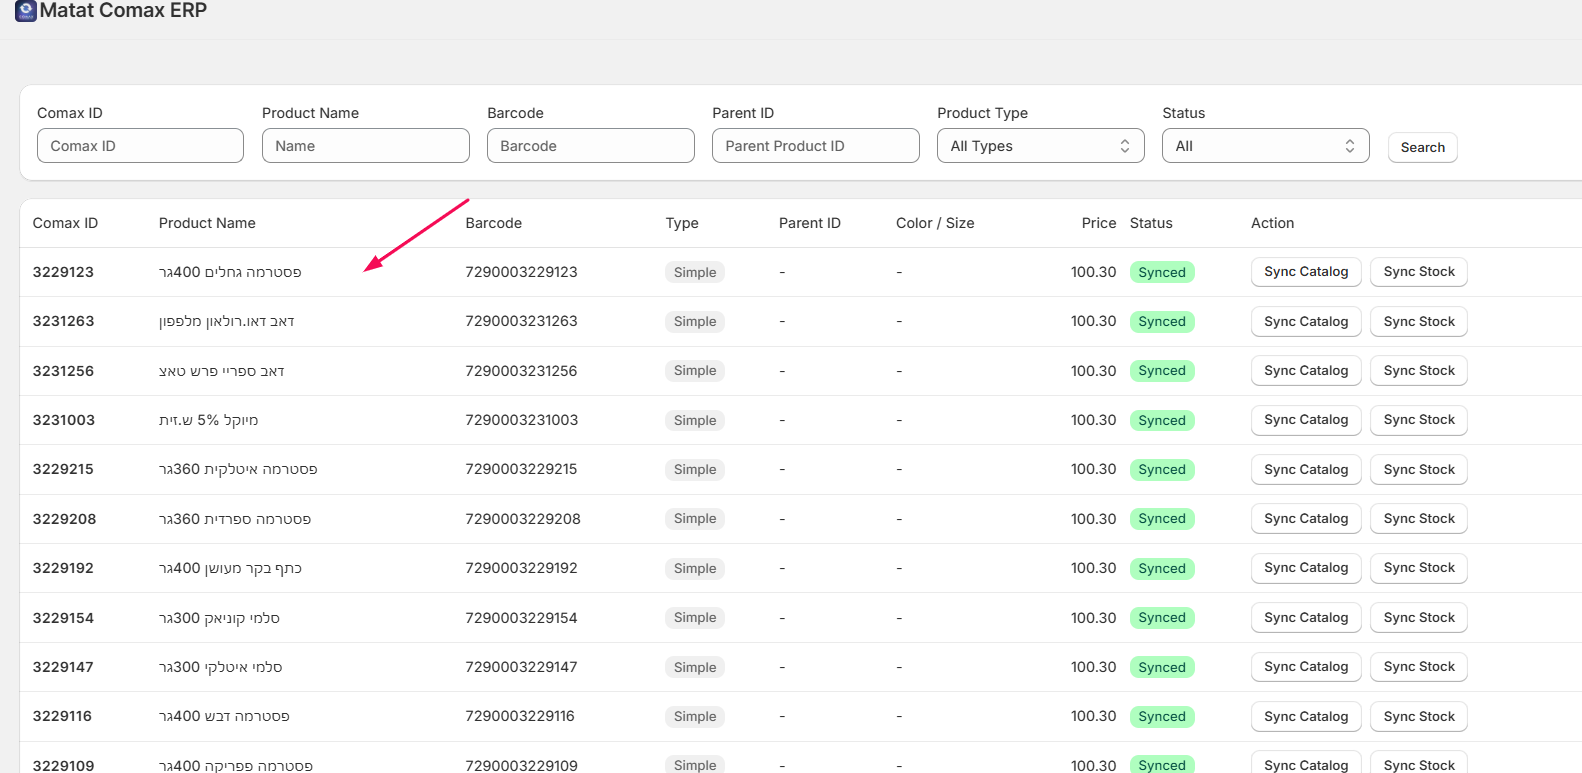
- You will see the list of products that you synced earlier during setup on the screen.
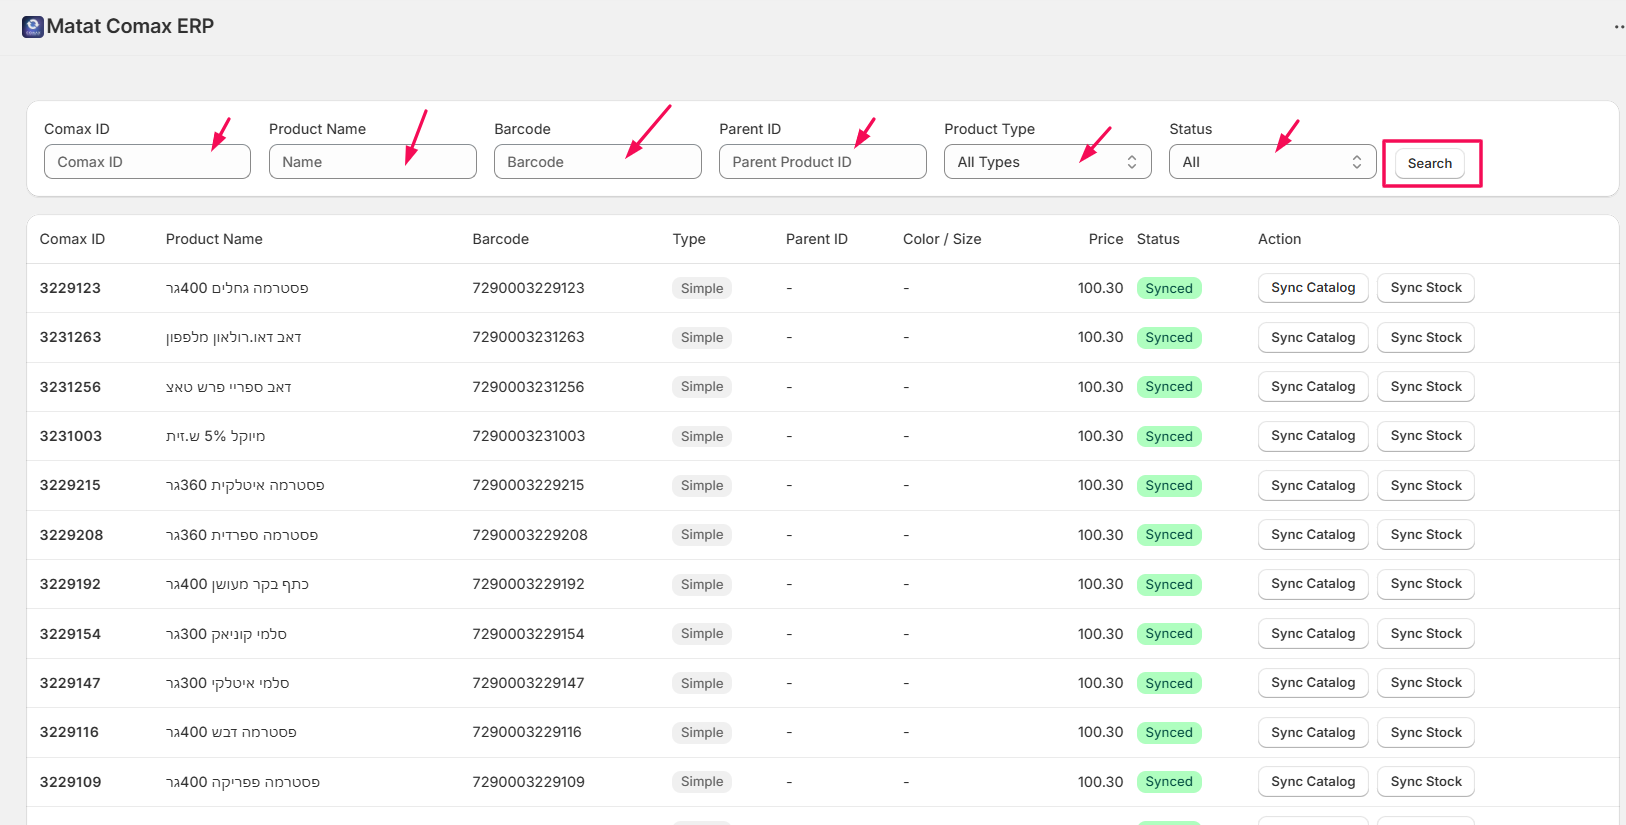
Filter Products
- Use the filter options to quickly locate the product(s) you want to sync.
- Filter options include:
- Comax ID
- Product Name
- Barcode
- Parent ID
- Product Type
- Status
- Click Search to display matching products.
Sync Catalog
- In the product row, click Sync Catalog.
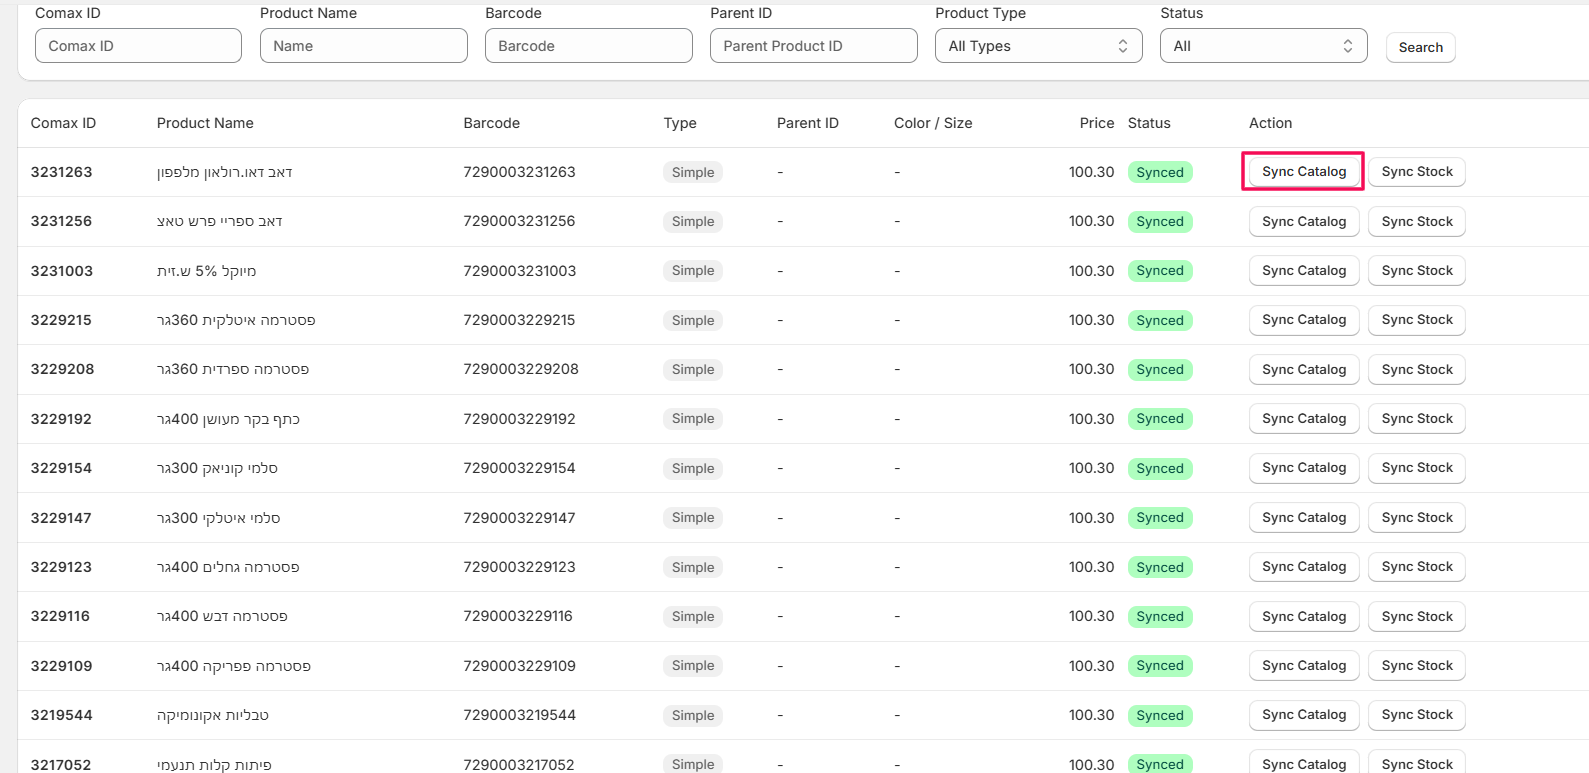
- Once the sync completes, a confirmation message “Catalog synced successfully” will appear.
- The synced product data will now appear in your Shopify site.
Verify Synced Products
- Go to your Shopify Product List.
- Click Open Product to view the details.
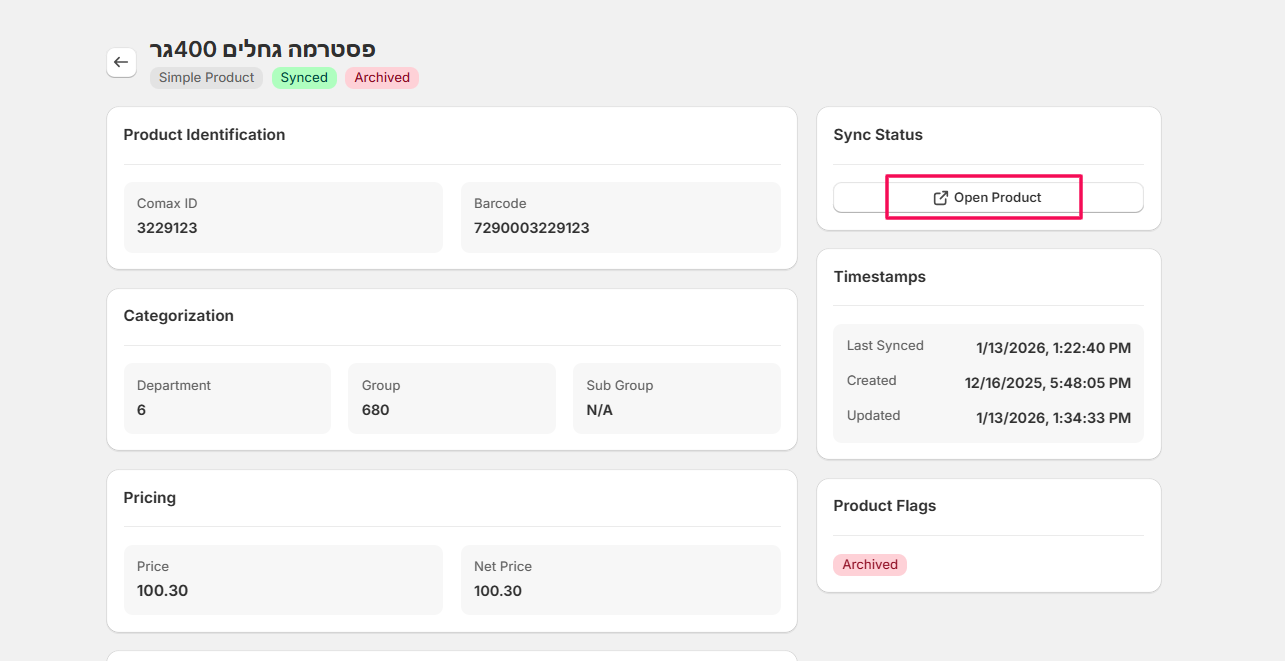
- By default, products synced from Comax via Catalog Sync are added as Drafts in your Shopify admin.
- Review the product data and set the products to Active to make them live in your store.
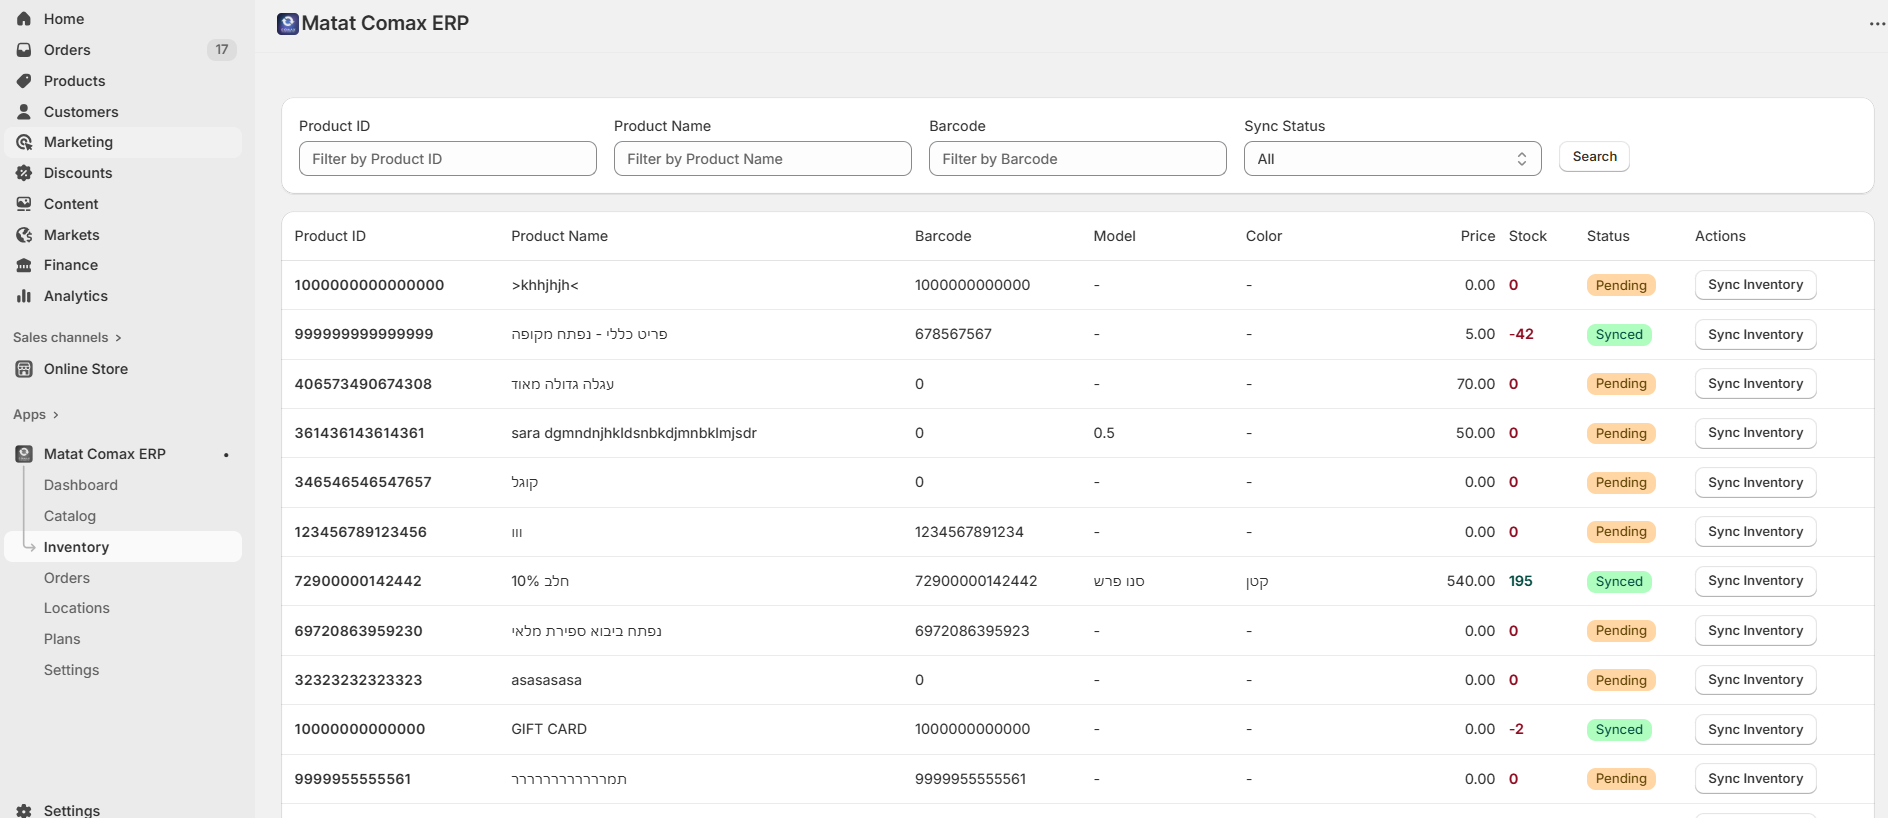
2. Managing Inventory
Viewing Products
- Click Inventory from the menu.
- Use the filters to search for specific products:
- Product ID
- Name
- Barcode
- Click Search to see the filtered results.
Syncing Inventory
- Select the product(s) you want to sync.
- Click Sync Inventory.
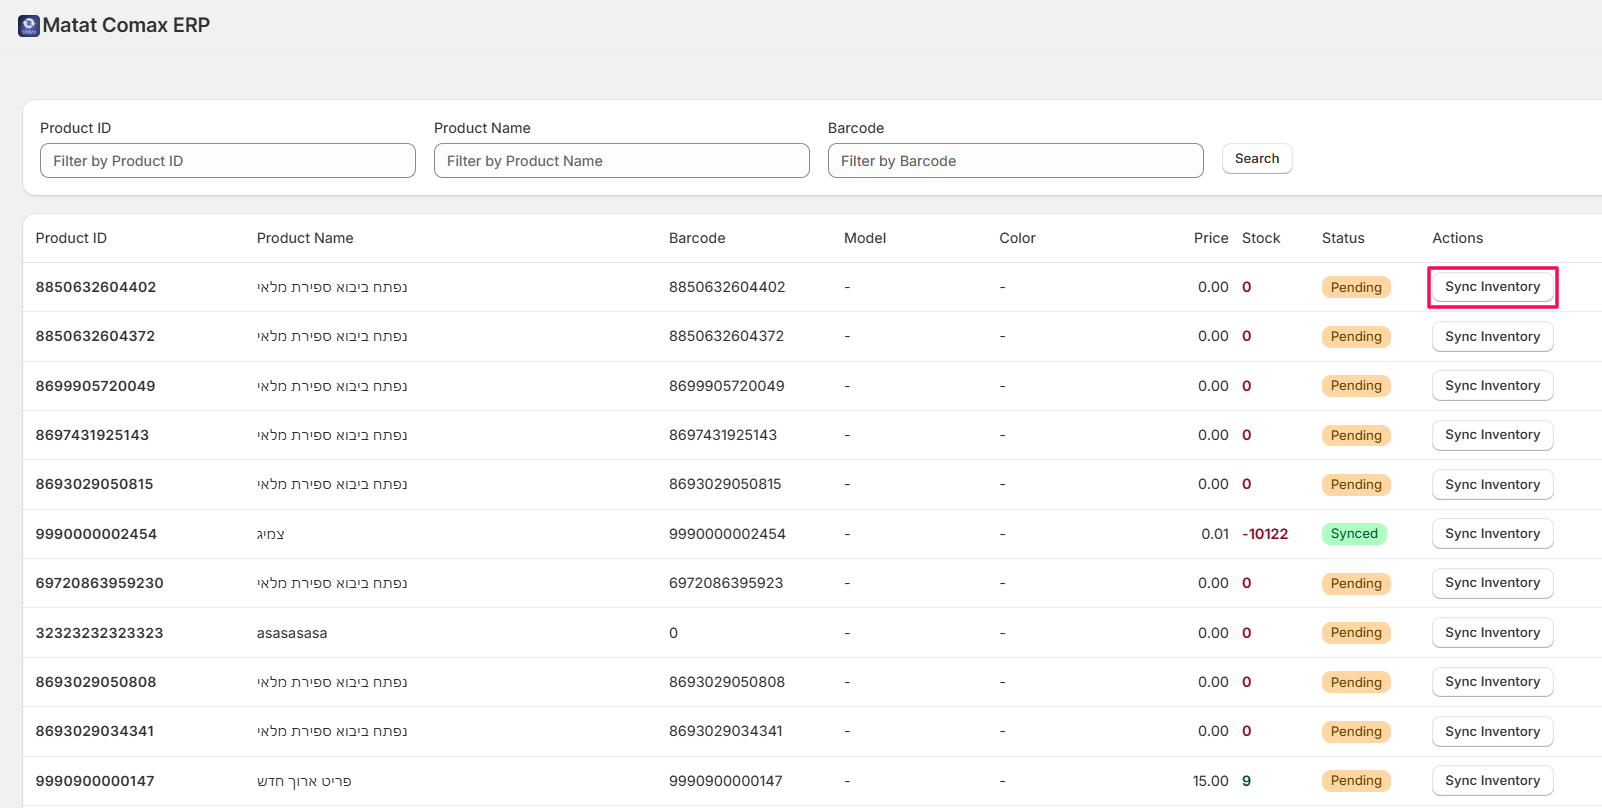
- This will update the stock levels of the selected product(s) to match the data from Comax.
- Wait a few moments until the sync is complete.
Note: Regularly syncing your inventory ensures your Shopify store always reflects accurate stock levels from Comax.
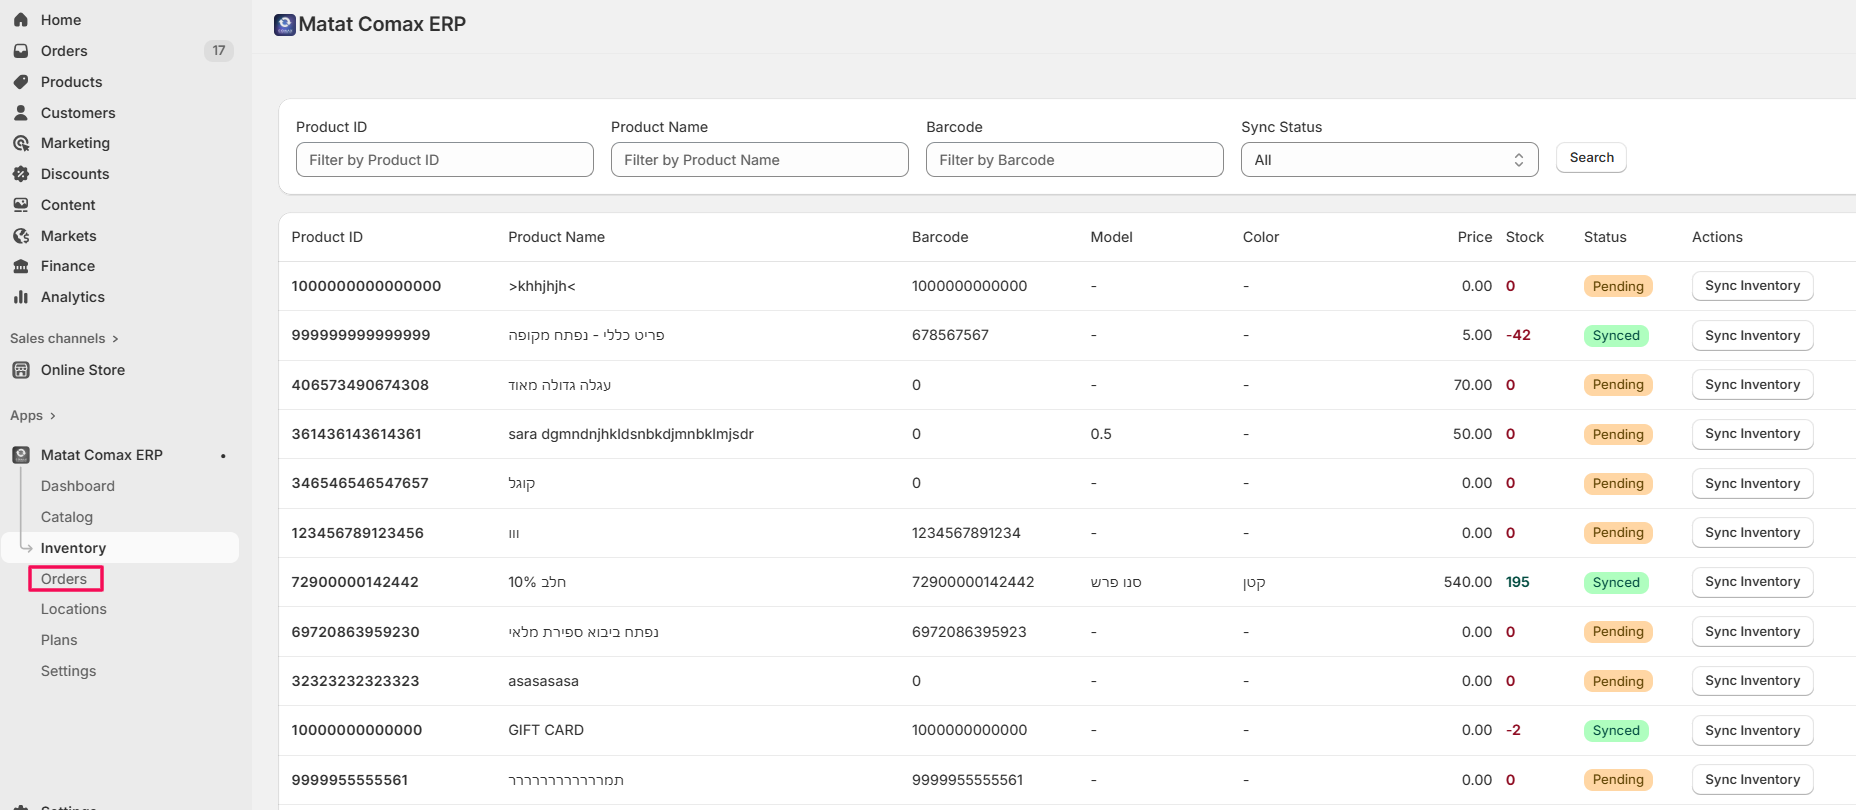
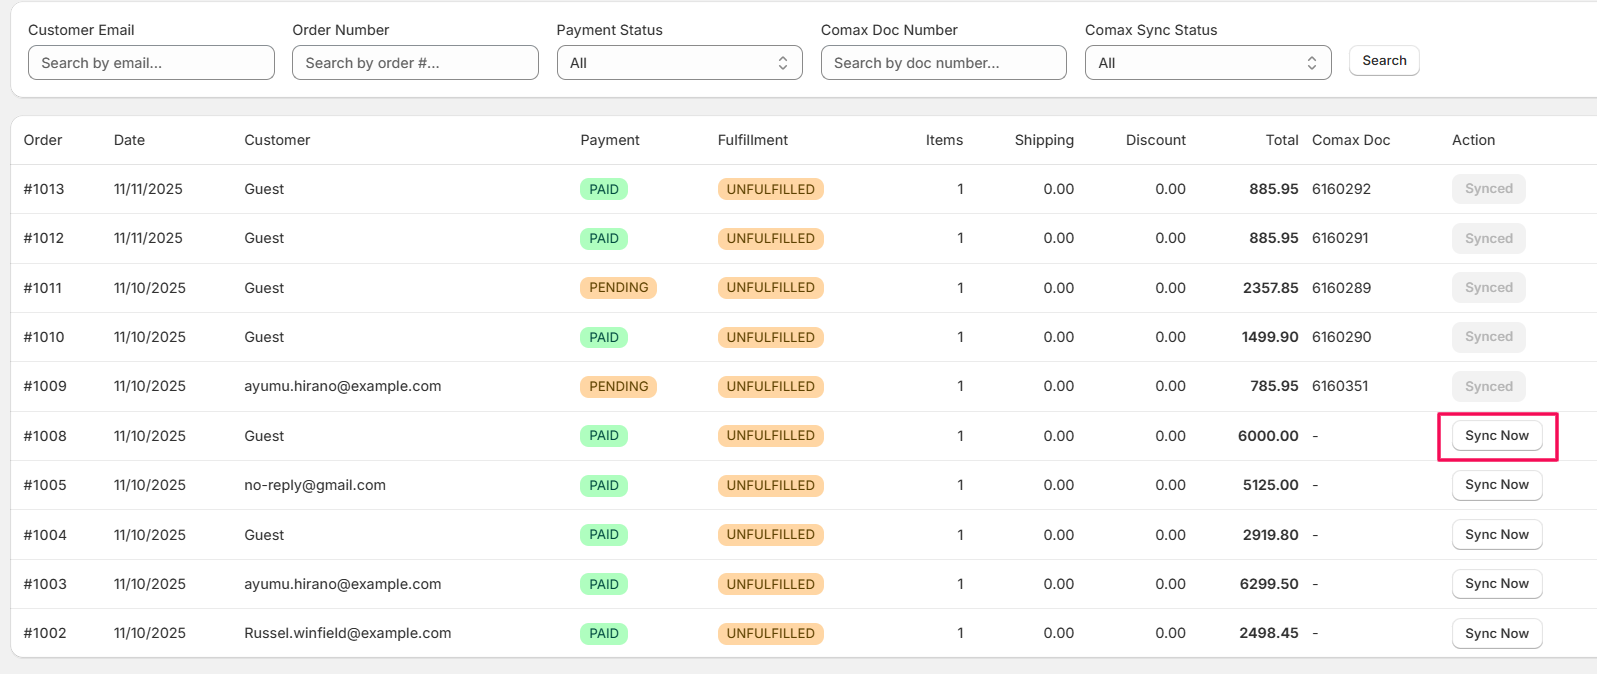
3. Managing Orders
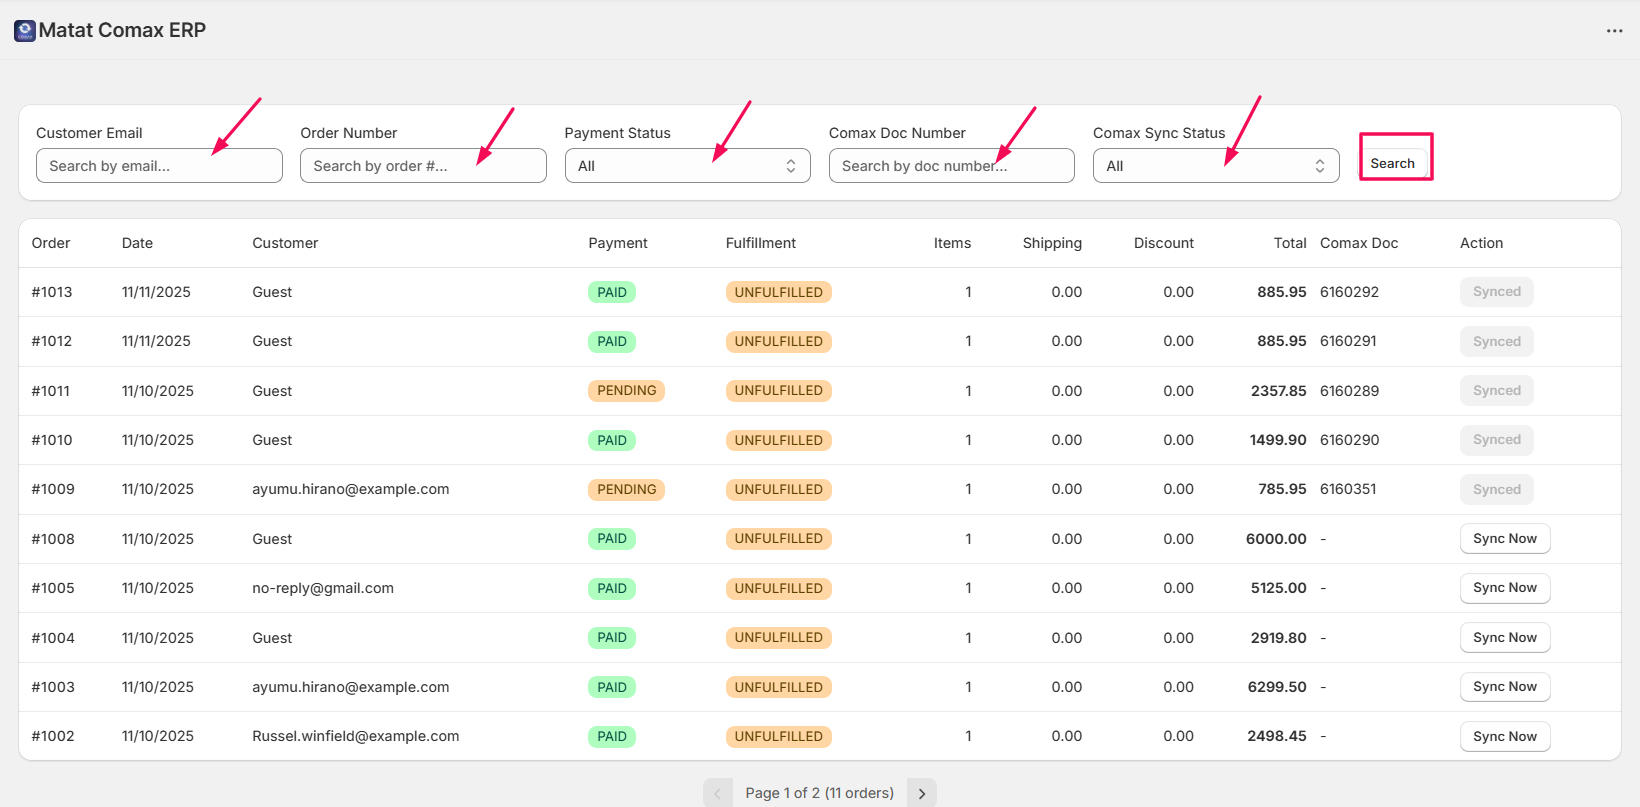
Viewing & Filtering Orders
- Go to Orders from the dashboard or setup menu.
- Use the filters to search for specific orders:
- Customer Email
- Order Number
- Payment Status
- Comax Doc Number
- Comax Sync Status
- Click Search to see the filtered results.
Syncing Individual Orders
- Select the order you want to sync.
- Click Sync Now to sync that order with Comax.
- This ensures the order is updated and recorded in Comax properly.
- Once the sync is finished, the action status will be updated, and the Comax ID (document number provided by Comax) will appear in the list.
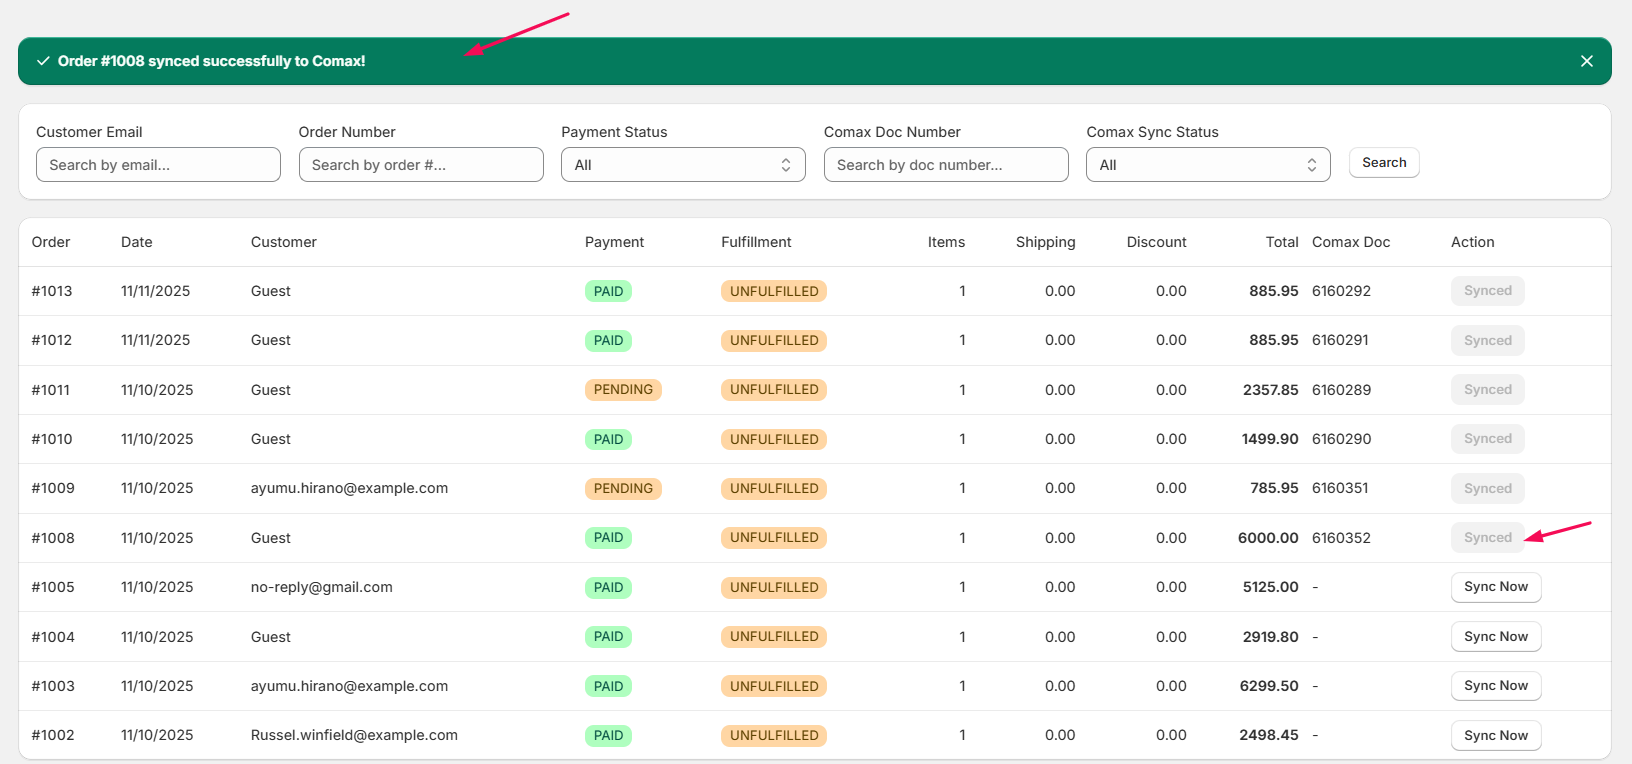
Tip: Use filters to quickly find orders that haven’t been synced yet or need updates.
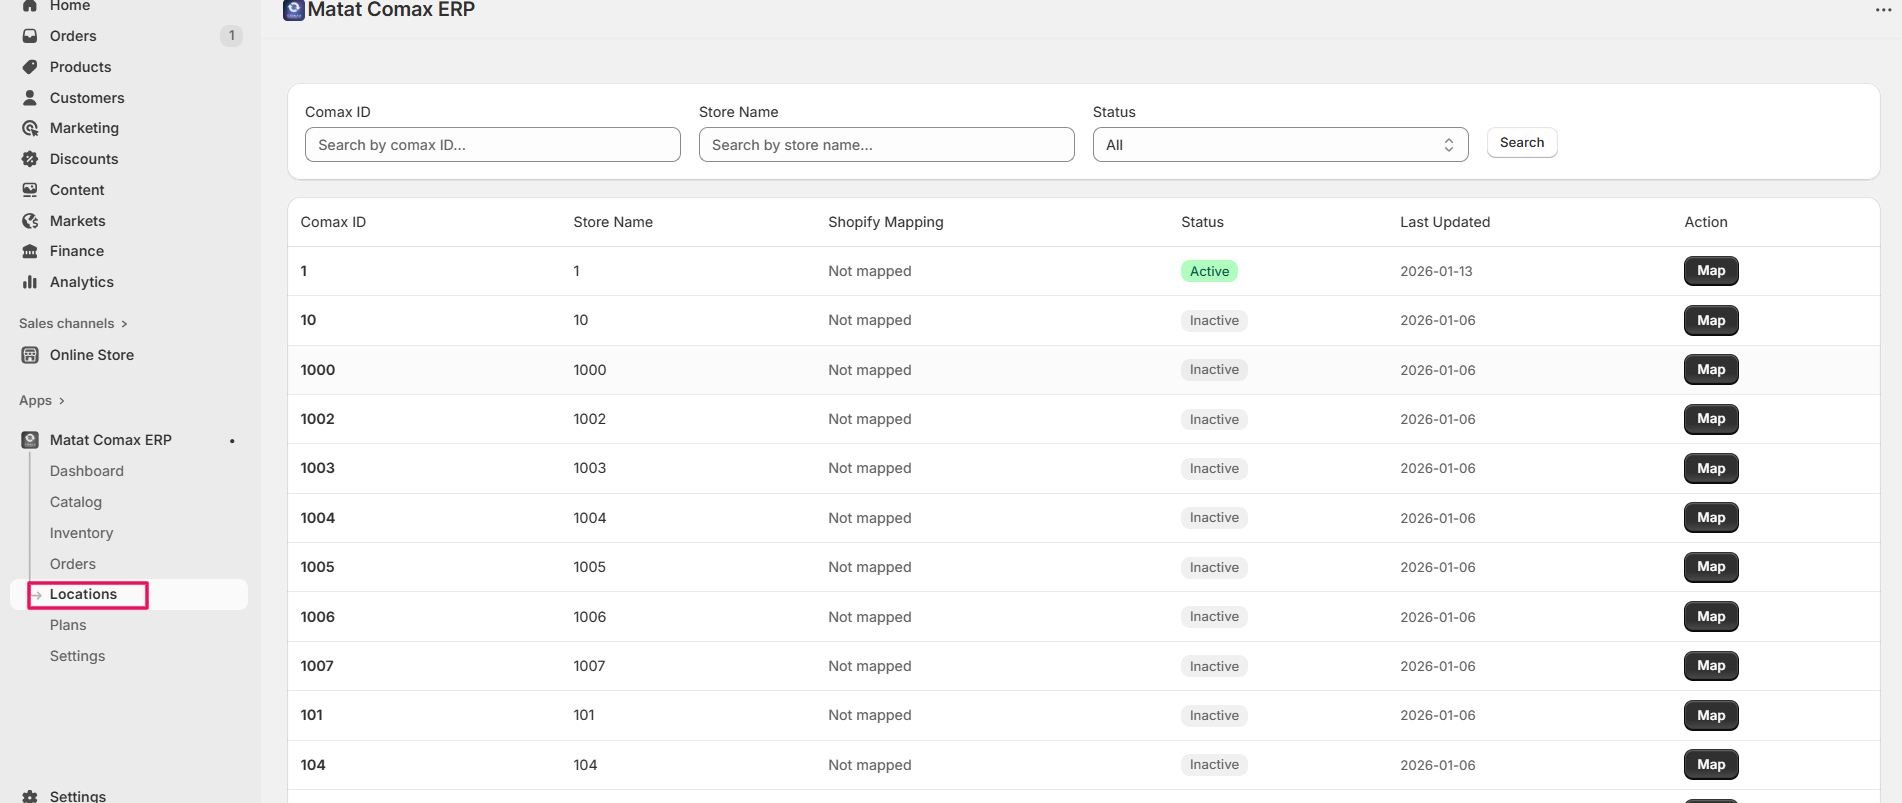
4. Mapping Locations
- Navigate to the Locations section of the system.
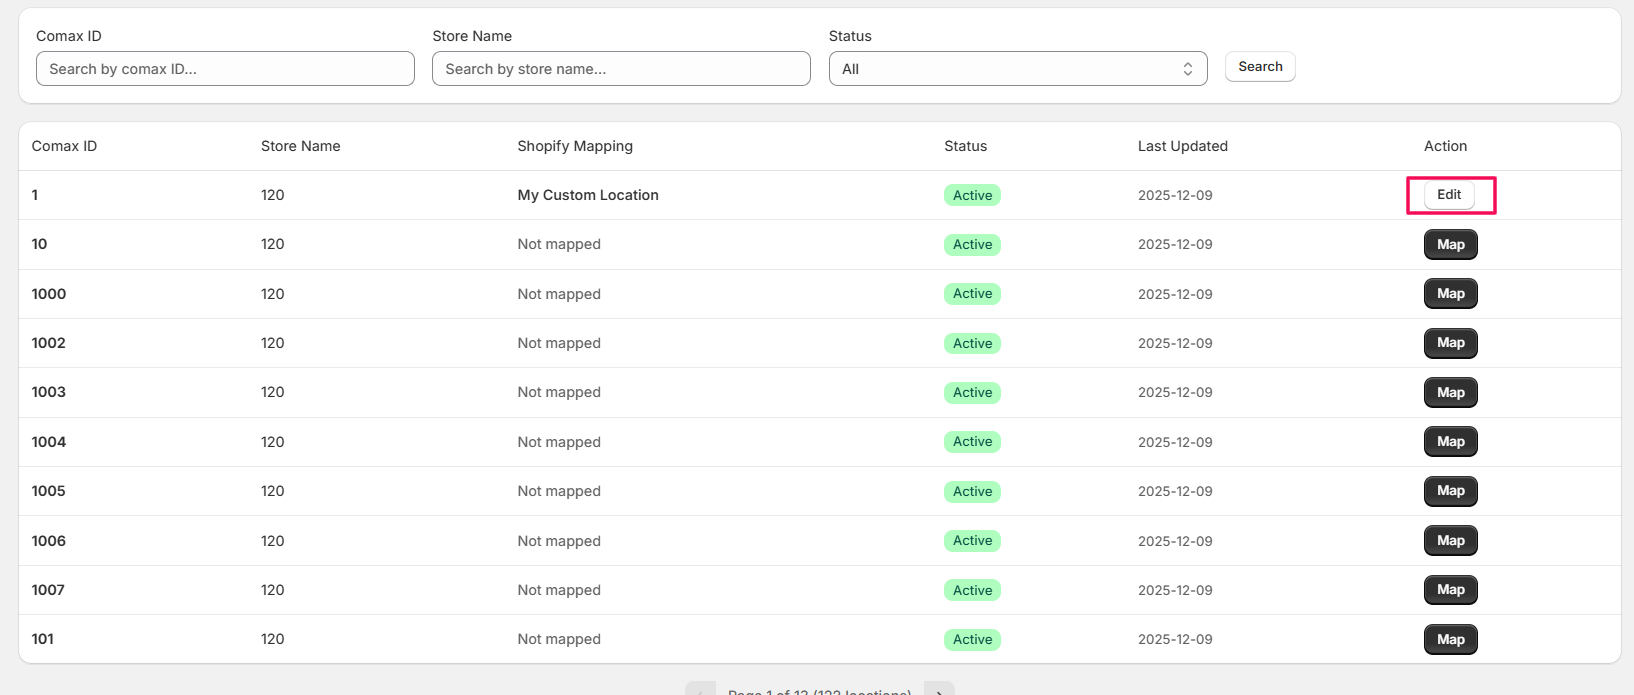
Filter Locations
- Use the available filters to narrow down the list:
- Comax ID
- Store Name
- Store Status
- After setting your filters, click Search.
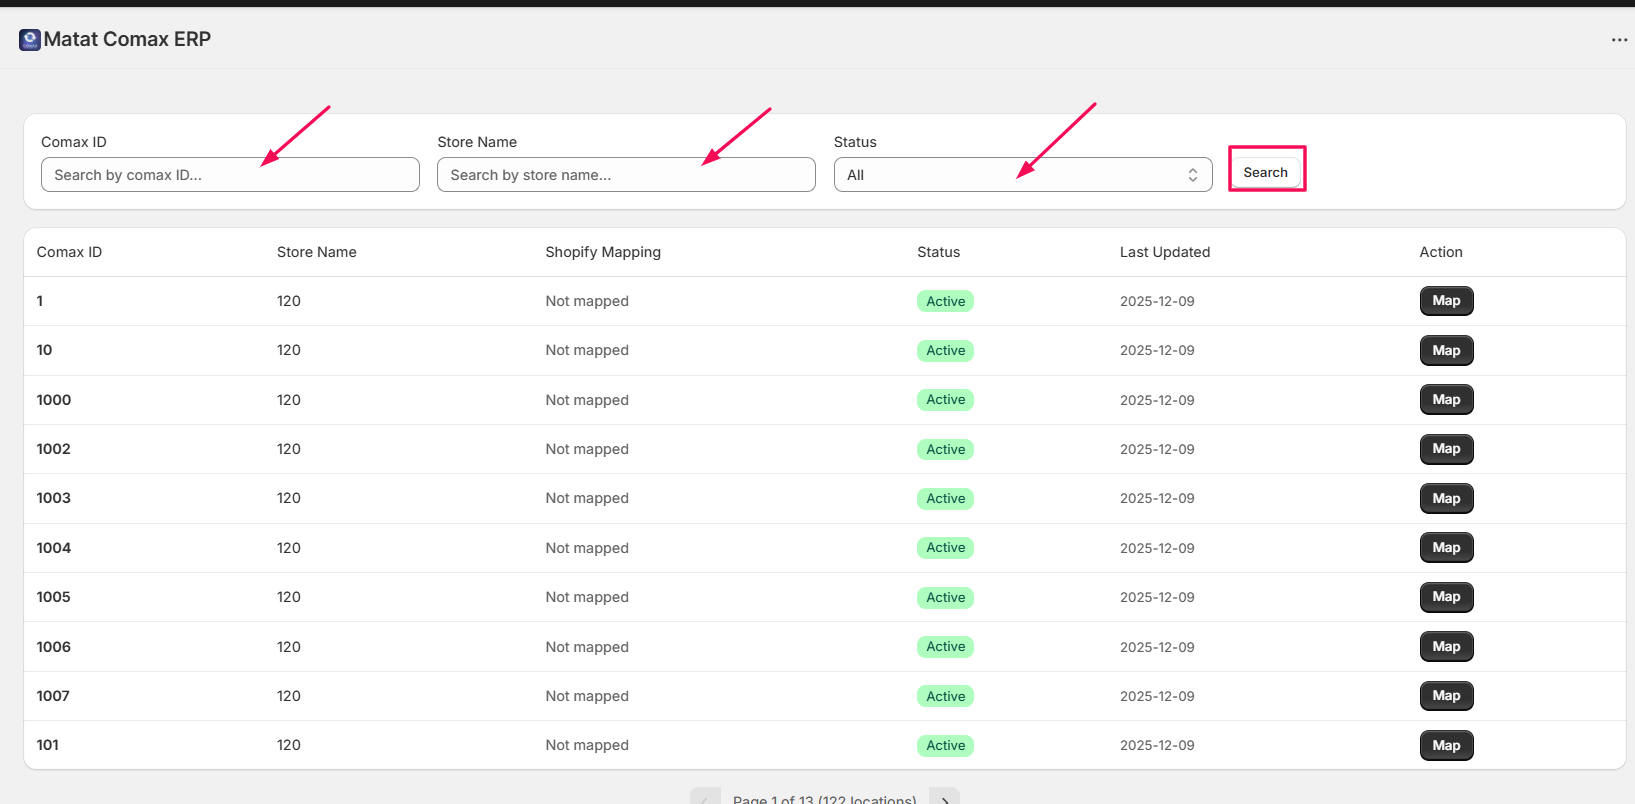
Map Locations
- To map an individual location, click Map next to the location.
Select Shopify Location
- On the mapping screen, locate Select Shopify Location.
- Click the dropdown and choose the correct Shopify location.
Set Location Status
- Under Location, select either Active or Inactive, depending on the current status.
Note: Only those inventory items with an active, mapped location will be synced into Shopify. Mapped location but no active status will be ignored during the sync process.
Save Mapping
- Click Save Mapping to finalize the mapping process.
- Once mapped, click Edit to make changes to the mapping.
- Make changes as per your requirement, and click Save Mapping. If you want to delete the mapping, select Remove Mapping.
5. Settings & Auto-Sync Setup
Accessing Settings
- Go to Settings from the dashboard or left-hand menu.
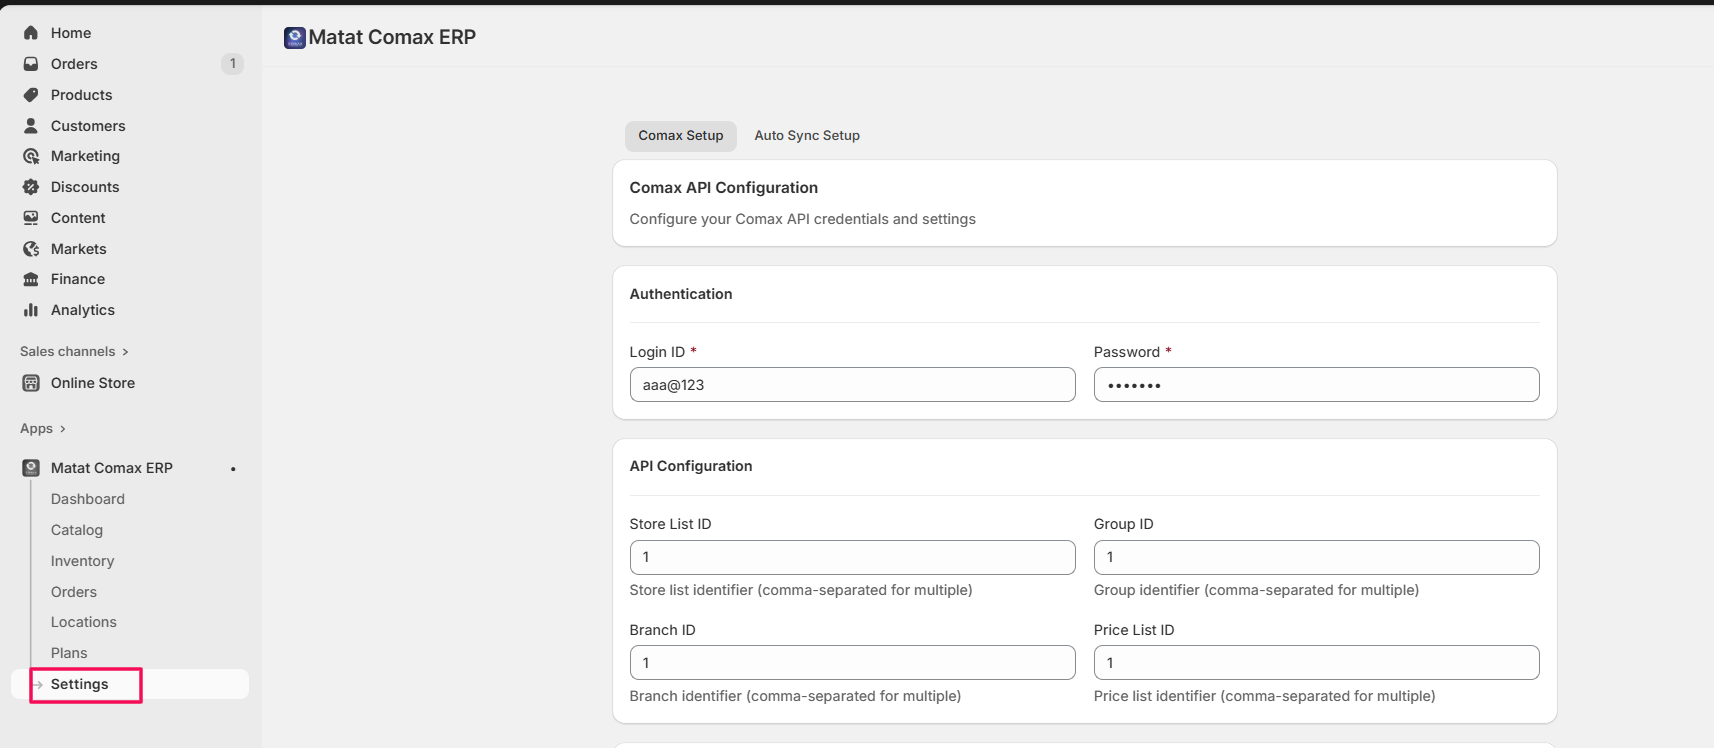
- Here, you can configure Comax Setup (repeat the earlier Comax configuration (Step 3) steps if needed).
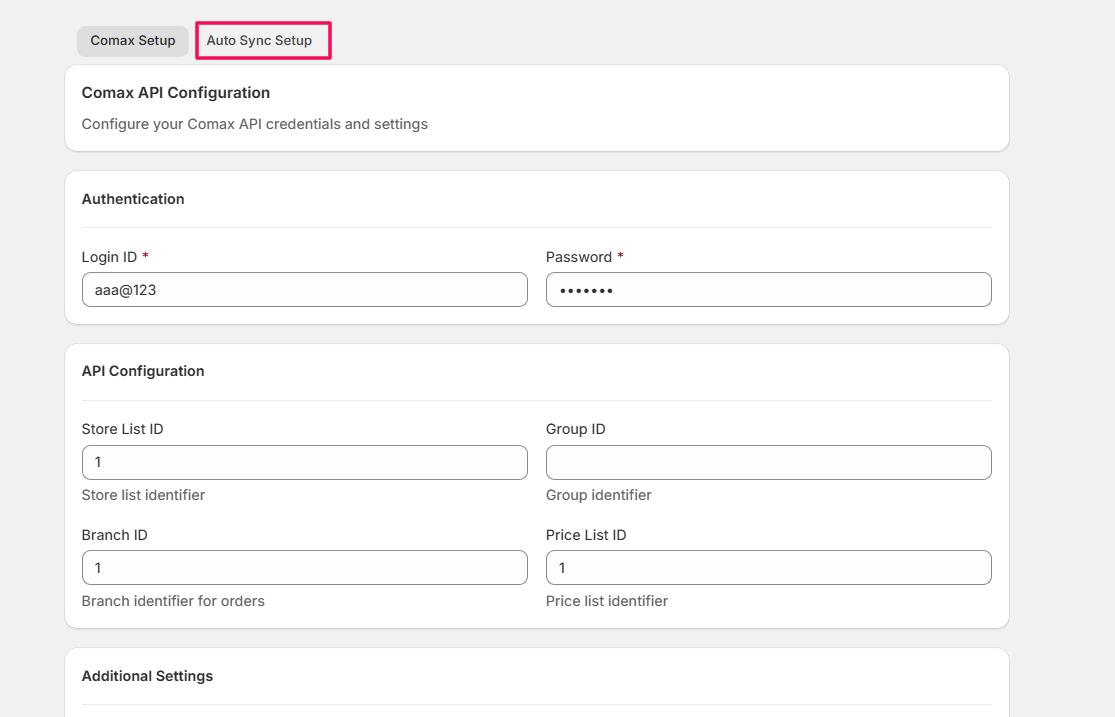
Auto Sync Setup
- Go to Auto Sync Setup.
Automatic Catalog Sync
- Check the box for Catalog Auto Sync.
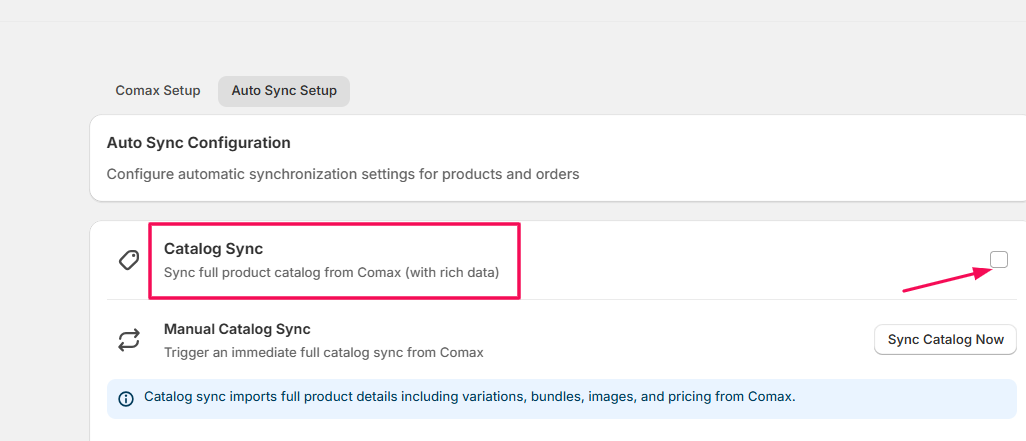
- Select your preferred interval from the Sync Interval dropdown.
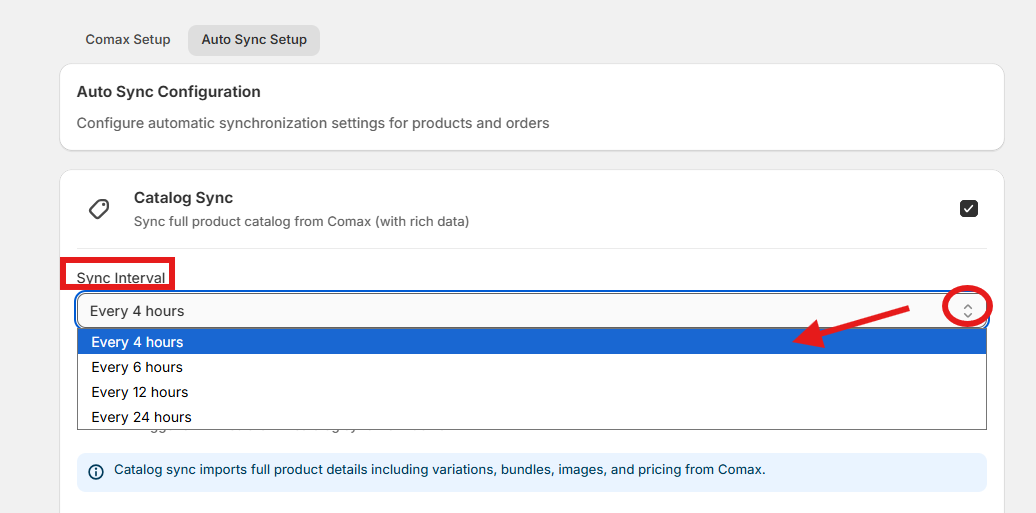
- Click Save Auto-Sync Settings
Inventory Auto-Sync
- Check the Inventory Sync box.
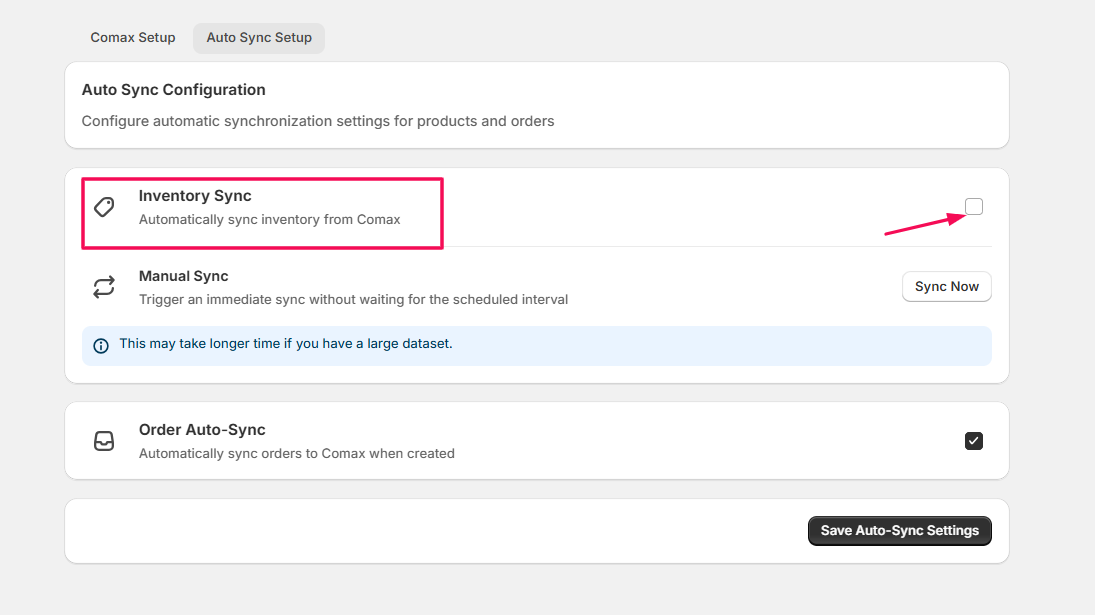
- Select the sync interval from the dropdown.
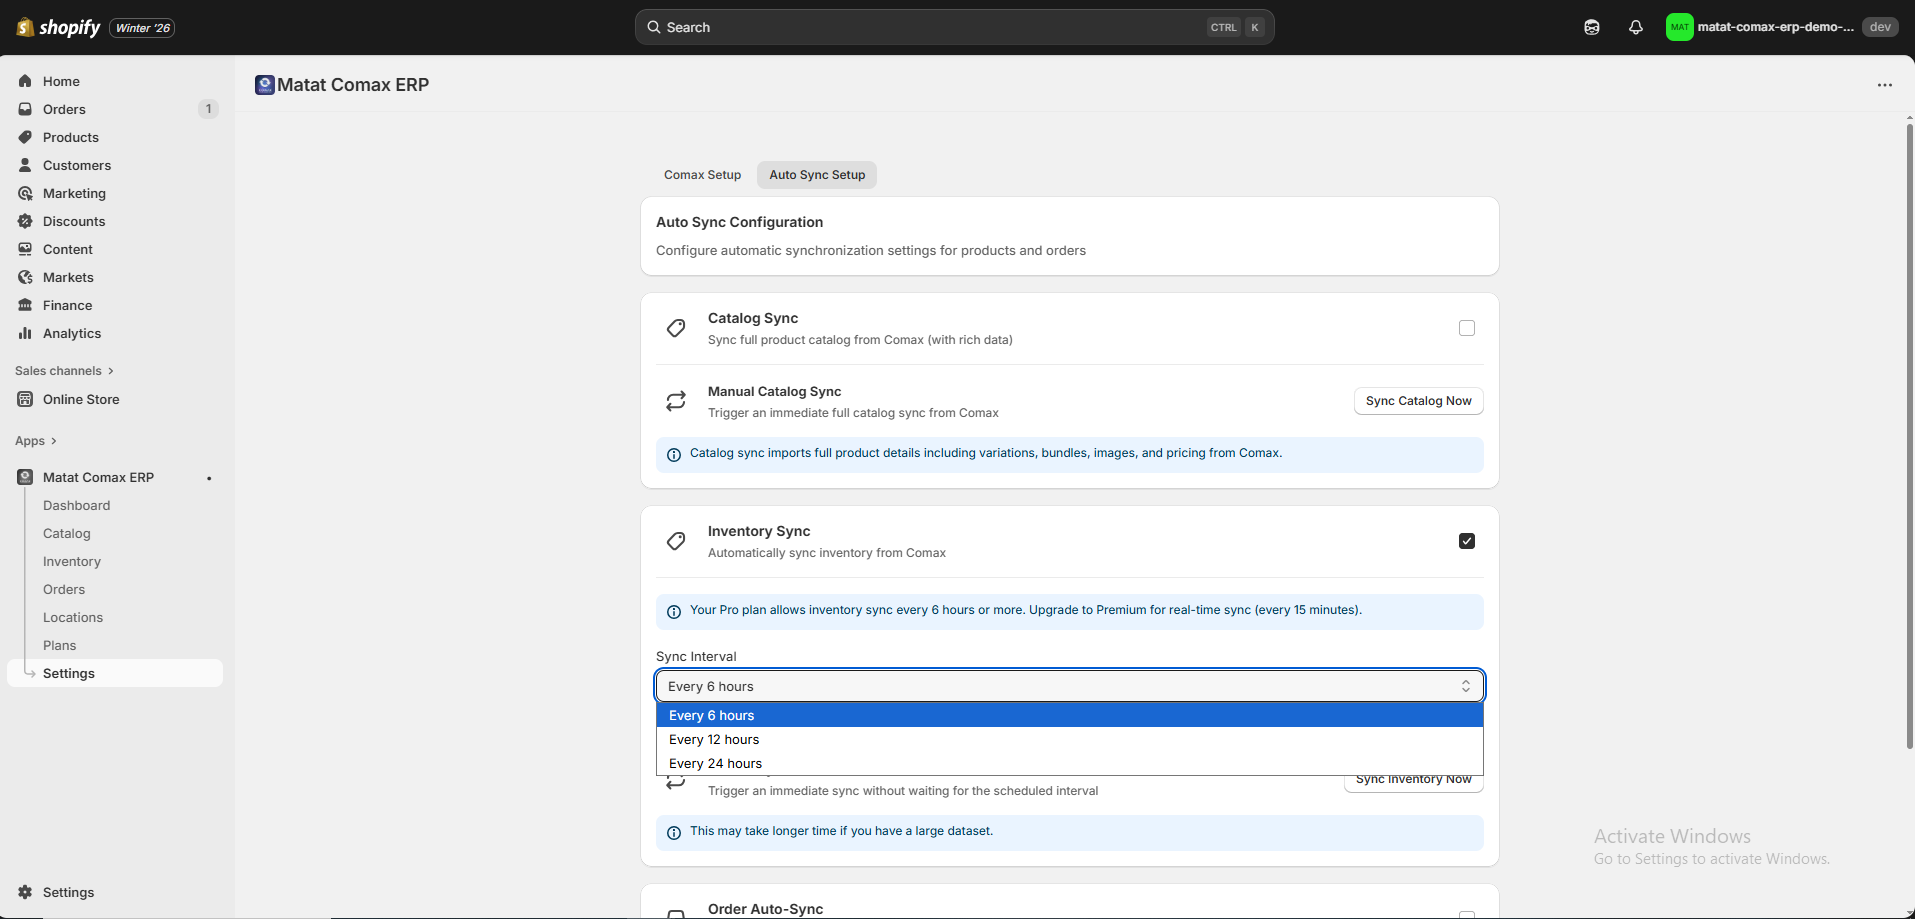
Note: Even in the Premium plan, automatic inventory syncing does not occur immediately. Premium users can set a minimum sync interval starting from 15 minutes, rather than having real-time updates whenever inventory changes in Comax.
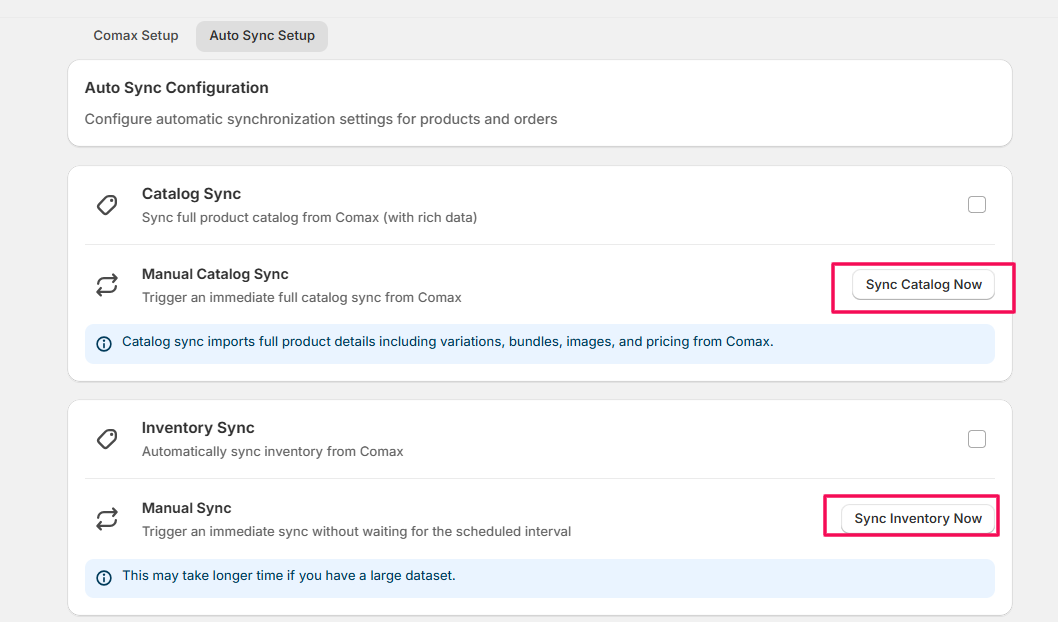
6. Manual Sync
- The Manual Sync option functions in the same manner as described earlier. You can manually trigger the catalog or inventory sync whenever needed.
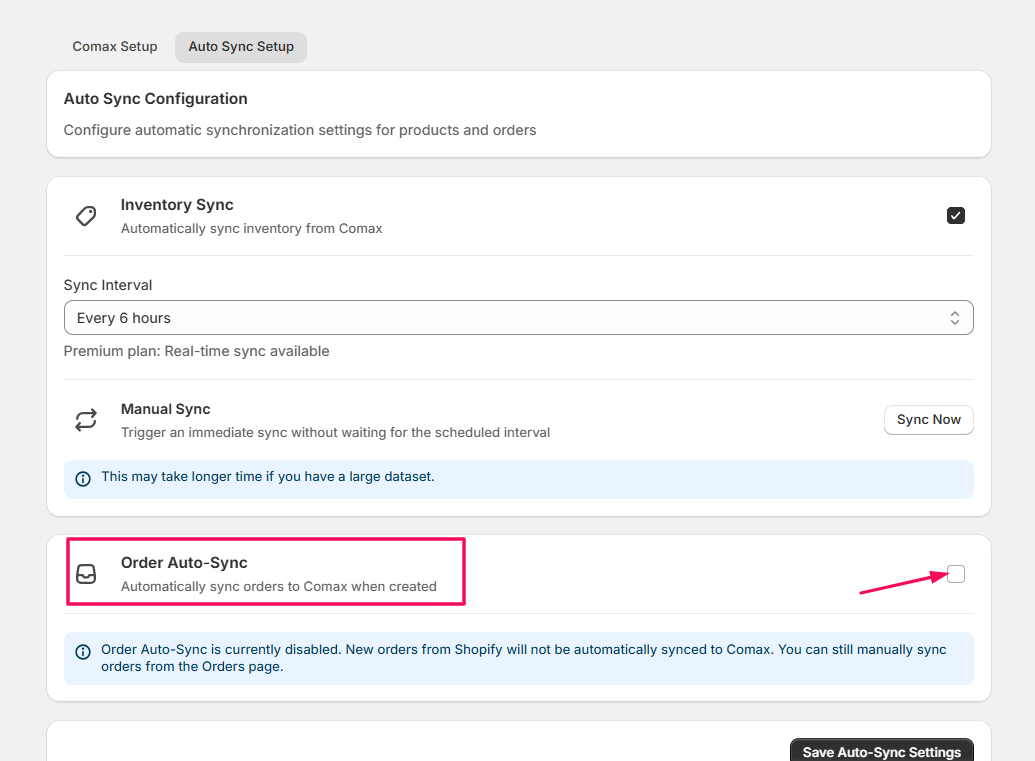
Order Auto-Sync
- Check the Order Auto-Sync box to sync newly created orders to Comax automatically.
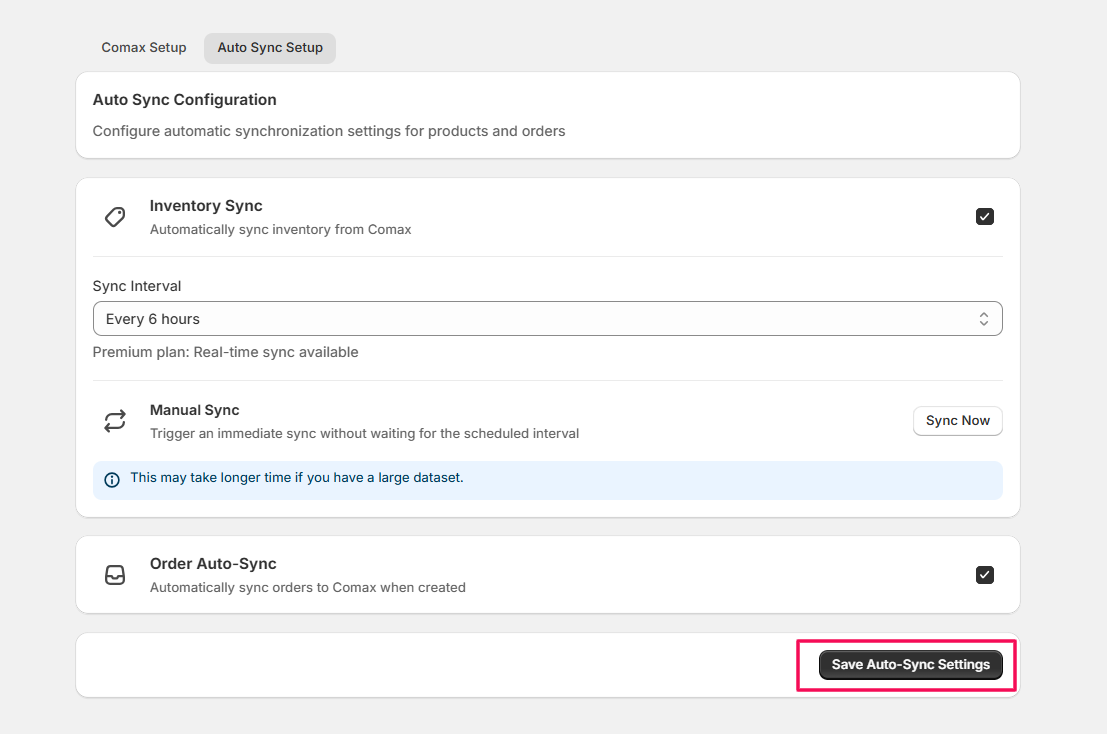
Save Settings
- Click Save Auto-Sync Settings to apply your changes.
Note: Enabling auto-sync ensures that your Shopify store and Comax data (inventory and orders) are always up-to-date without manual intervention.
How Matat Comax ERP Helps Your Store
Once you have fully configured the Comax app, your Shopify store will be seamlessly connected to your Matat Comax ERP. Hence, you will be able to:
- Keep inventory in sync automatically: Product stock levels stay up to date across Shopify and Comax, including support for multiple locations.
- Manage products from a single source: Product details, pricing, and availability are controlled from Comax and reflected in Shopify.
- Streamline order processing: Orders placed in Shopify are automatically sent to Comax for fulfillment and tracking.
- Support multi-location and multi-channel operations: Automation minimizes the need for duplicate data entry and improves accuracy.
- Reduce manual work and operational errors: Centralized data helps you monitor inventory, orders, and fulfillment in real time.
- Gain better visibility into your business: Centralized data helps you monitor inventory, orders, and fulfillment in real time.
Note: This application is actively under development. As new features and improvements are released, this documentation will be updated to reflect the latest changes.

